Virtual Private Clouds#
When you start with a fresh, new AWS account, the first thing you need to do is create a VPC. Technically, AWS gives us a VPC by default, called the "default VPC", but we're going to ignore this VPC and create our own.
A VPC is a software defined network that you use to contain your AWS resources. It depends a networking boundary around those resources, a boundary that you further reduce down into smaller software defined networks called subnets (something we cover later on.) The best way of thinking of a VPC is like the router you have at home, the one your Internet provider gave you: it's a private network that lets all the devices "attached" to it talk to each other, but it also enables you to talk to other devices on the public Internet too.
Note
At least you use a VPC to contain most AWS resources, but not all AWS resources. Some of them are global services, like IAM and S3.
Before we get too deep into VPCs, let's visualise what a simple AWS account would look like with a VPC and some subnets (we cover subnets next). We'll then explore this visualisation in a bit of detail so we can get an idea of what a VPC is doing for us:
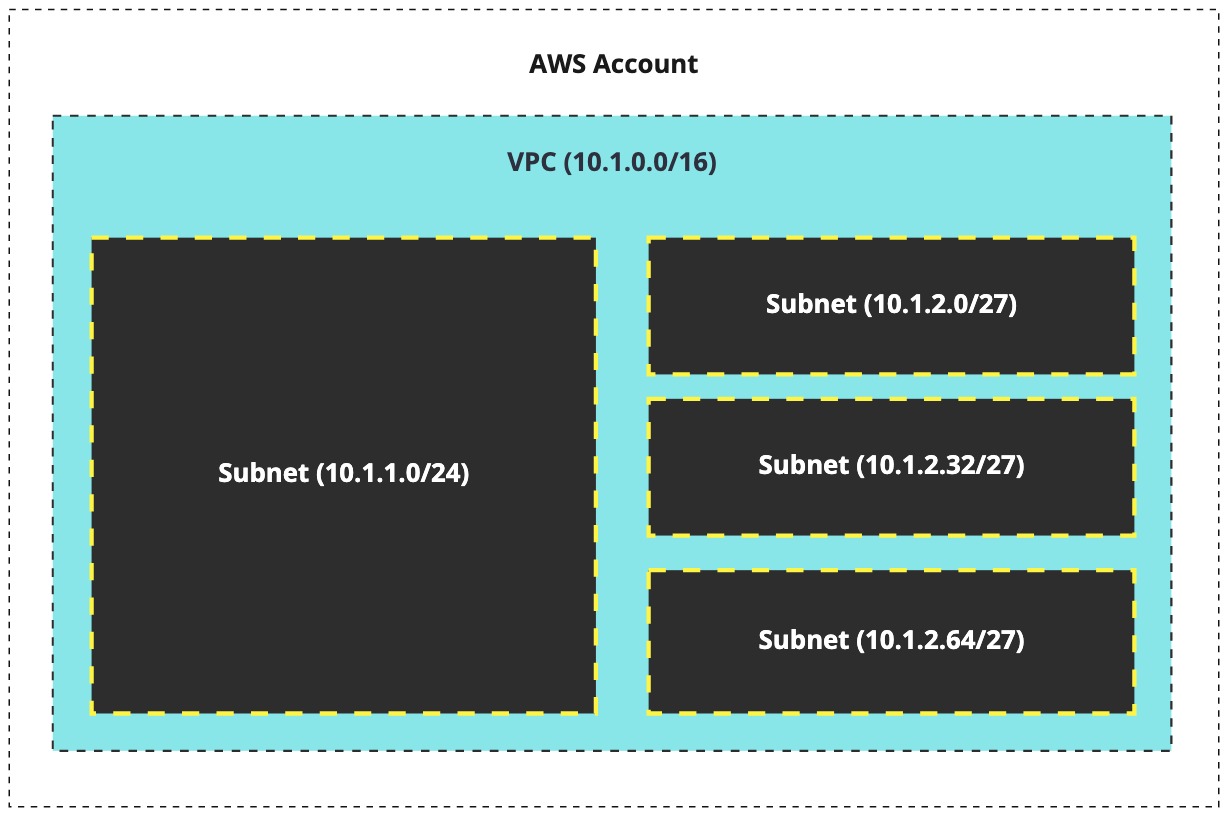
What we can see above is an AWS account with a VPC, which in turn as some subnets inside of it.
A VPC resides inside of a single AWS account and represents a network. In this illustration, our VPC has a CIDR block of /16. This means that we'll get 65,534 private IP addresses that we can assign to resources inside of the VPC. That's a quite a lot.
Note
If the concept of a CIDR range/block is new to you, then review the CIDR networking section of this course.
We've also defined four subnets. One subnet is given a /24 range of the /16, which gives it 254 private IP addresses. The other three subnets are /27 subnets, which give each of those subnets 30 private IP addresses. What this means, ultimately, is that the VPC has 65,534 private IP address minus the /24, /27, /27, and /27 (because there are three subnets that are /27). The subnets are assigned 344 (254 + 30 + 30 + 30 = 344) inside of the VPC's /16, so the VPC now has 65,190 (65534 - 344 = 65190).
Note
You cannot create a subnet smaller than a /28 in AWS.
Warning
AWS reserves five (5) IP addresses inside of every subnet that you create. So if a /27 gives you 30 IPs, in AWS you only get to use 25 of them. Keep this in mind when designing networks in the future.
So subnets are how are distribute the private IP addresses inside of a VPC, and a VPC represents one large network.
Creating a VPC#
So you've logged in as network-admin and you've goto the search bar at the top of the AWS Console and typed in "VPC". Now you're in the VPC console. This is where you configure the networking configuration of your AWS account and resources. If you look down the left hand panel, you'll see there is a lot of services and technologies to use. Feel free to explore, but mostly ignore them for now and stay focused.
Click on "Your VPCs" under "Virtual private cloud":
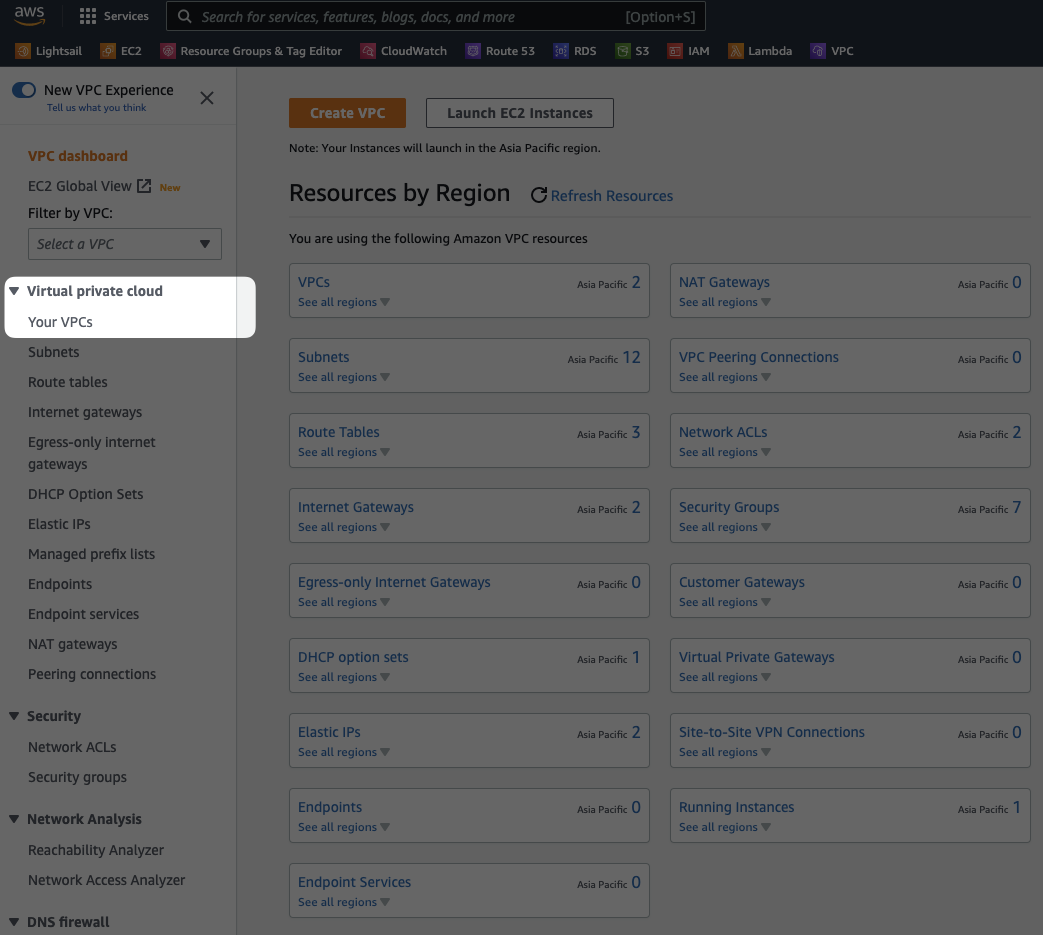
You'll see a list of VPCs that exist inside of your account. By default, the only VPC you'll have is the default VPC. We can safely ignore that VPC for now. It's primarily used to allow you to start creating things like EC2 instances quickly, without having to worry about the networking side of things. That's not ideal if you're trying to master AWS.
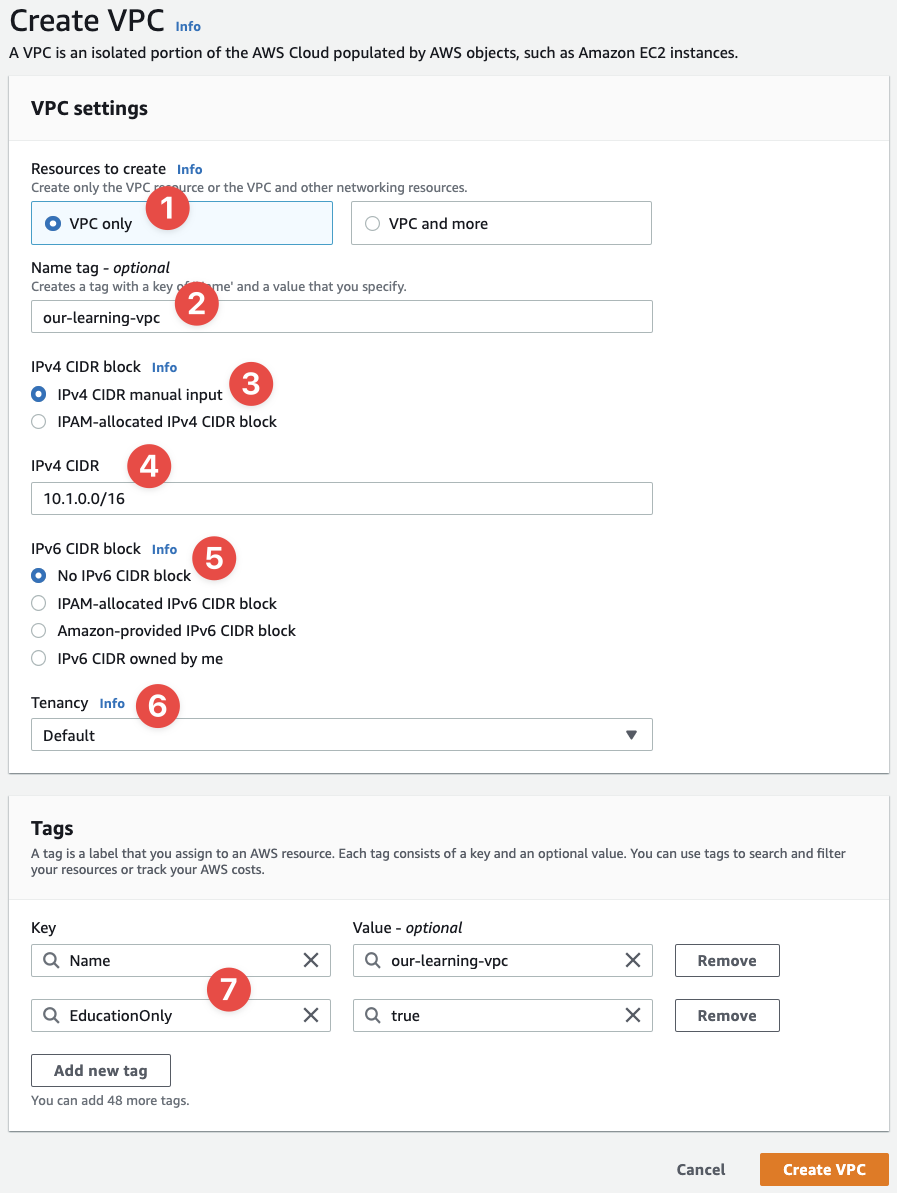
Instead, click "Create VPC" in the top right of the page. You'll be presented with the following page:
Note
The "VPC and more" option (next to 1 in the screenshot) is super cool and very interesting, explore it, but don't get too attached to it as I want you doing things the (more) manual way for now. This is a learning experience at this point.
- We're going to be working with the "VPC only" option for now
- Make sure to provide a name for our VPC, which will become useful later on:
our-learning-vpc - We want a IPv4 CIDR as we don't have an IPAM
- We'll type
10.1.0.0/16into here to match our illustration from above - And we don't want to work with IPv6 today
- The "Tenancy" option is advanced and can be ignored at this point in time
- We can see we have a
Nametag, but also add another tag:EducationOnlyand set the value totrue
Note
I know, the "VPC and more" option is really cool! It has a fancy diagram and it does so much of the work for you. At this point in time you don't know what it's doing for you, so let's learn how-to build everything up ourselves, bit by bit, and then you can use the fancy automation features (although you won't want to after you see Terraform.)
Now click "Create VPC". You'll eventually see this screen (but with different IDs and details, obviously):
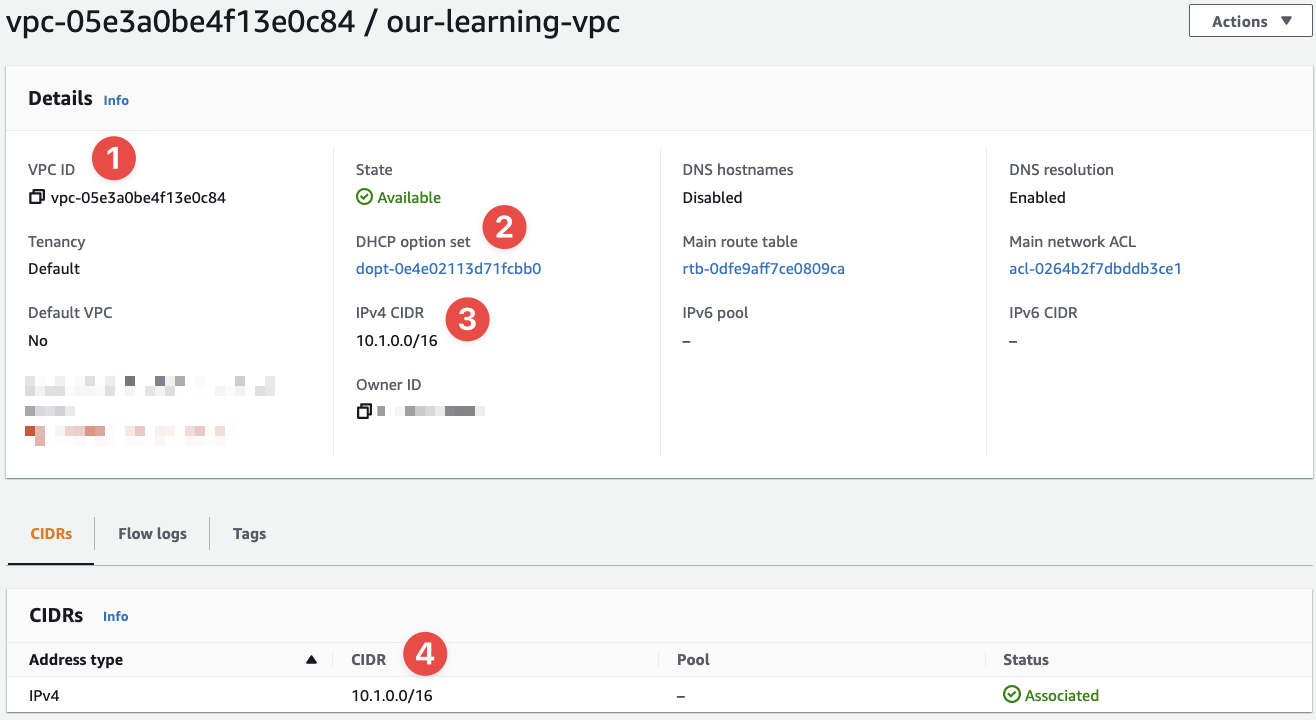
- This is our VPC ID. We use this is with our subnets later on
- We covered DHCP in the networking section - you can safely ignore this for now, but it's a powerful tool in advanced configurations
- This is the CIDR range we set the VPC to cover
- And this is the CIDR range we requested for this VPC
And now we have a VPC. Just like that. Of course, it can get more complicated than this, but that's enough for now. Let's stick some subnets in there.