Subnets#
Overall, a subnet is a simple concept: Subnets are used to further divide up a VPC network into smaller units that act as smaller network boundaries. These boundaries are used to define customise routing behaviour for the resources inside the subnet, as well as security policies that restrict traffic to and from the subnet called Network Access Control Lists (NACL).
Subnets are how we organise the VPC into smaller networks. The size of a subnet - it's CIDR - depends on your requirements and use case for the subnet. If you need a lot of IPs, then you need a larger subnet. The /24 CIDR range is extremely common and gives you 251 private IPs (in AWS) for your use.
Note
AWS reserves five (5) IPs inside of the subnet. These are IPs you are unable to use:
.0.1.2.3.255
So if a CIDR gives you 256 addresses, you actually only get 251.
Each subnet has its own Route Table, something we explore later on in this networking section. The Route Table defines rules about how traffic leaves the network and where it goes. This defines whether or not the subnet is a private or public subnet.
Creating subnets#
We need four subnets. Here are the details of each one.
| Name | CIDR | Availability Zone (AZ) | Route Table |
|---|---|---|---|
massive-az-a | 10.1.1.0/24 | a | private-servers |
servers-az-a | 10.1.2.0/27 | a | public-servers |
servers-az-b | 10.1.2.32/27 | b | public-servers |
servers-az-c | 10.1.2.64/27 | c | private-servers |
In this, there's no particular reason why I've selected these subnet ranges or those names. They're just choices I've made that demonstrate what can be done. In the real world, you'll be responsible for designing sensible subnet sizes as requirements demand. We're just learning here, so these choices are sufficient.
Note
Using az-a, etc., in the subnet name is a common way of being able to tell what Availability Zone the subet is in a at a glance in the UI or command line. We cover Availability Zones (AZs) later on in the AWS section.
Under "Your VPCs" you'll see "Subnets" - click this. What you will see is three subnets inside of the default VPC, which does not suit our needs. Instead, let's create three new subnets. Click "Create subnet" in the top right of the screen to start the process:
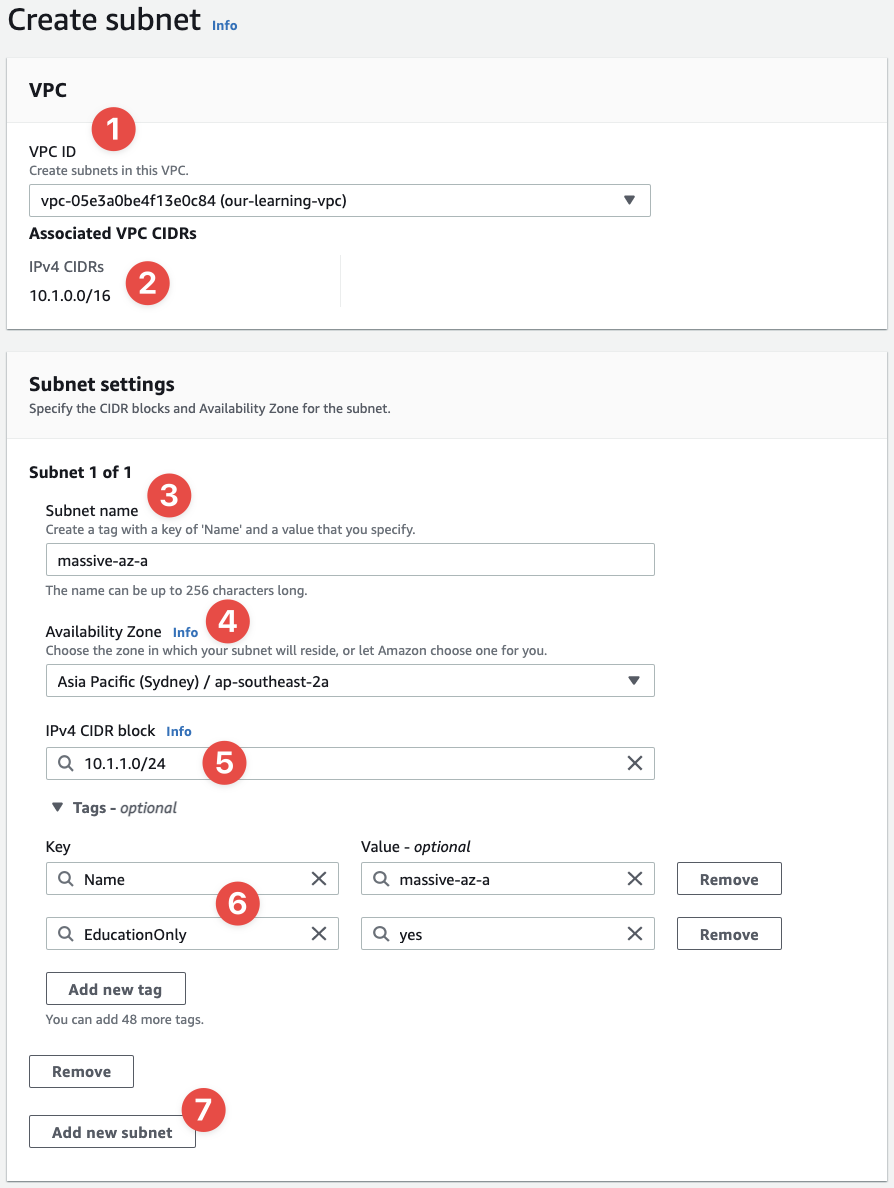
- In this list, select the VPC you just created - notice how the
Nametag we gave it (our-learning-vpc) is now coming in handy? We can quickly identify the VPC in the list. - Note the CIDR range of the VPC is made available here - our subnet CIDRs have to be smaller than this
- Now we give our subnet a name: call this one
massive-az-a - Now select the select the AZ in your region that has
aat the end: mine isap-southeast-2a - Set the CIDR range to
10.1.1.0/24 - Add our
NameandEducationOnlytags to the subnet - And finally click the "Add new subnet" button
When you press the "Add new subnet" button, you'll get the option to add another subnet to this process and then you can "batch" create all four subnets. Repeat the above in the new fields that appear, using the details from the table above. Click "Create subnet" when you're done. Here's the result:
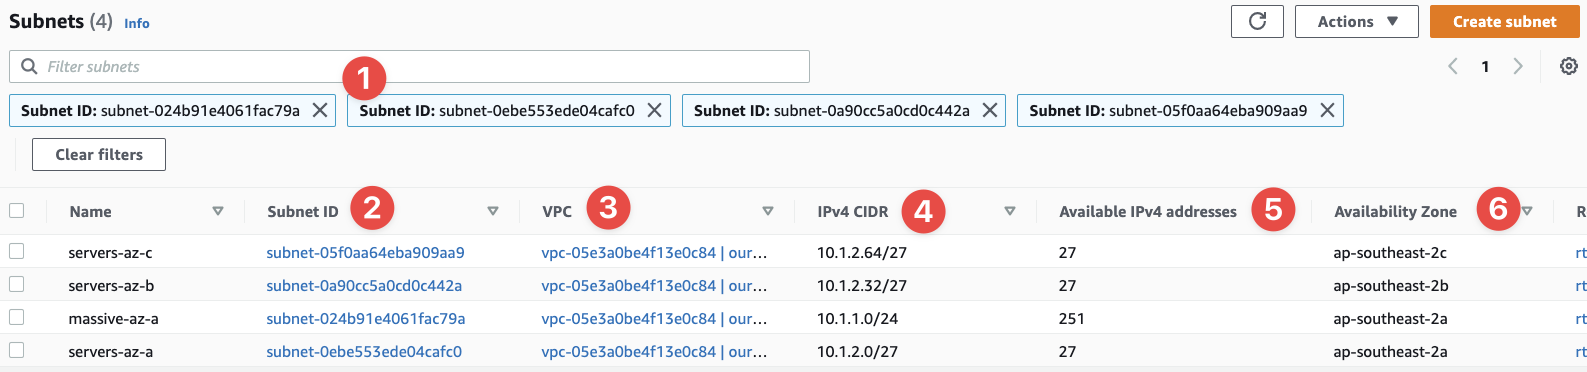
- The console take us back to the Subnets page, but it filters it to show us only the subnets we just created
- This is the subnet's new ID
- Here we can see the VPC ID we put the subnets inside of
- The CIDR ranges we selected for each subnet
- The number of IP address we get inside of each subnet - notice how some are missing? Remember: AWS reserves five IPs inside every subnet
- And we can confirm the availability zone for each subnet
And just like that, we have a VPC and some subnets. Now we can start setting up the infrastructure inside of the VPC and these subnets that allows us to reach the public Internet.