Route Tables#
We create route tables and attach them to subnets. That subnet then understands how to route traffic based on a single characteristic of the traffic: its destination address.
The destination address of either inside the subnet or outside the subnet. If it's inside the subnet's CIDR range, then no routing is needed. If it's an IP outside the subnet but inside the VPC, then still, no routing is needed. However, if the destination IP address is outside of the VPC's CIDR range, then something has to know how-to route that traffic, and it's the Route Table that explains how-to achieve that.
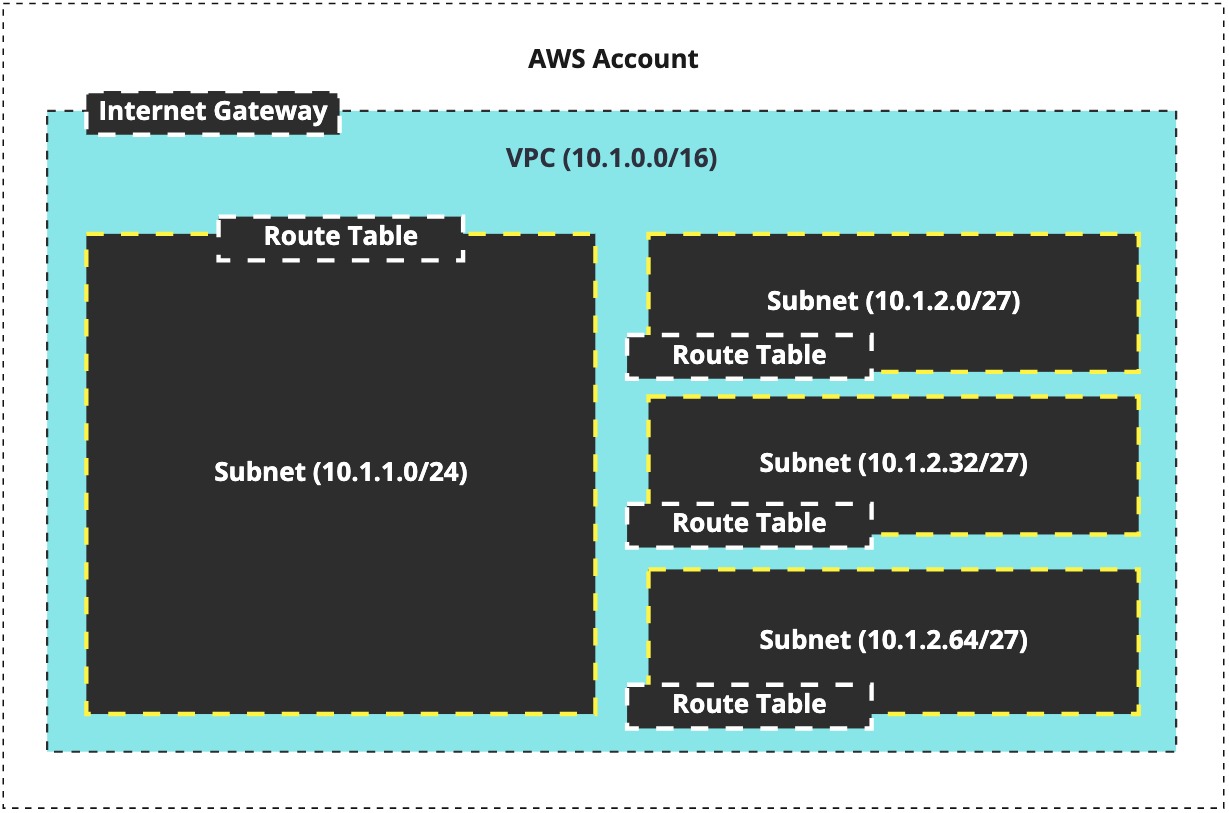
With Route Tables attached to the subnets, our previous illustration is updated, as such:

Note
I'm using an IGW here, as opposed to a NATGW, because they're the easier to understand, more redundant, and don't cost anything (more or less.)
And on top of that, let's visualise what traffic decisions look like:
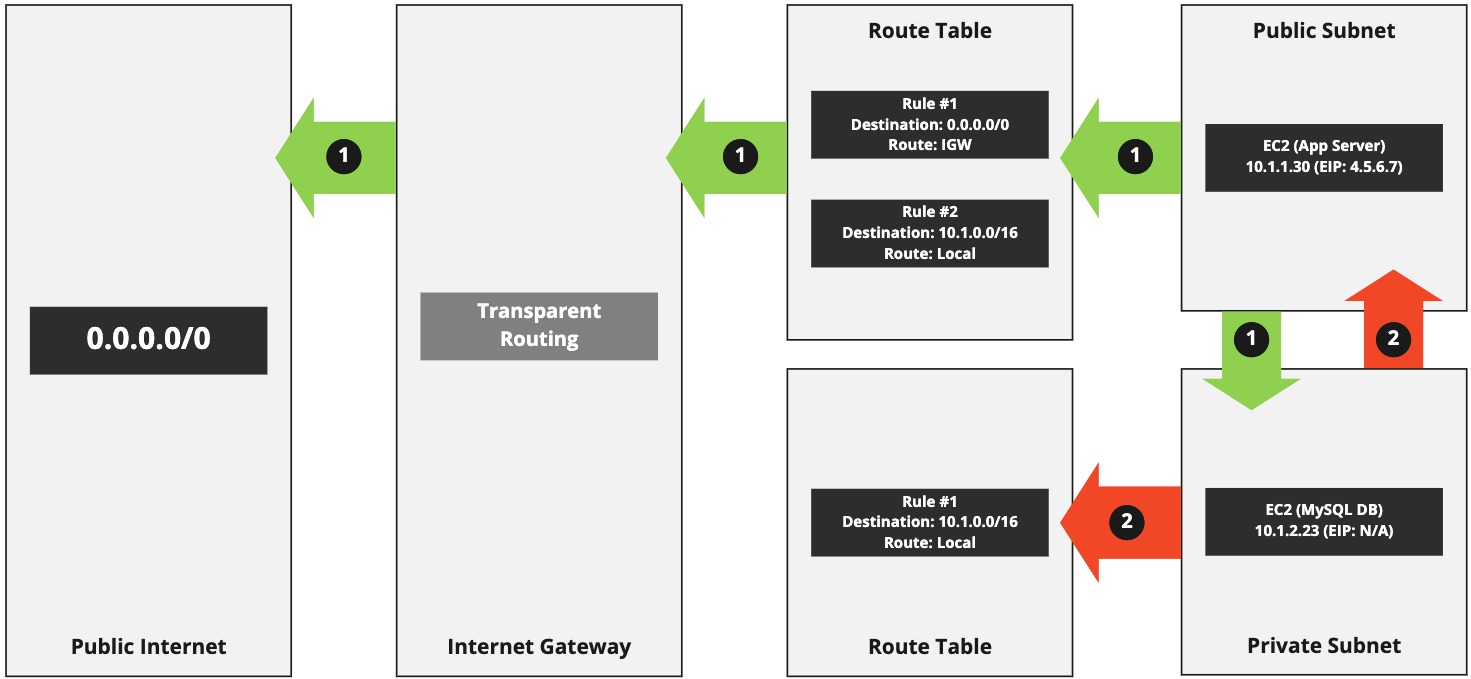
This visualisation demonstrates that a Route Table attached to each subnet decides how traffic is routed, which includes restrictions on that traffic.
For traffic flow 1 (the green flow), we can see that system 10.1.1.30 can send traffic to the public Internet. That's because rule #1 inside of the Route Table routes traffic to the IGW when the destination address doesn't fit any other rule: 0.0.0.0/0.
Note
It's also important to note that the EC2 instance (App Server) has a public IPv4 address attached to it (an EIP), which is also required when using an IGW to access the Internet.
Warning
In the above configuration, the App Server having an EIP means it's also exposed to the public Internet and can receive unsolicited connections from complete, random strangers on the Internet. That's generally something to avoid (using a NATGW or some other complex networking architecture.)
The same App Server, and its subnet, can also talk to other subnets inside the same VPC (we're ignoring possible security restrictions at this point in time.) That's a default and no rules are required to make that happen, although I have included one in the visualisation for clarity.
We can see that the second traffic flow, 2 (red), is only able to talk to other systems inside of the VPC. Systems inside of that subnet, and other subnets inside of the VPC, can talk to each other automatically (if we continue to ignore security.)
Creating route tables#
So far, we've created a VPC,an IGW, and a few subnets. Now we need to make some Route Tables that we'll later assign to subnets. To keep things simple, we'll configure two Route Tables for two specific purposes: public access and private, internal access:
| Name | Subnets | Public |
|---|---|---|
public-servers | servers-az-a, servers-az-b | YES |
private-servers | servers-az-c | NO |
Head over to the VPC section of the console adn then select "Route tables" on the left (under "Subnets".)
You're going to see a single default Route Table - we'll ignore this. It's the default Route Table that is created when you setup the VPC. It only allows internal routing inside of the VPC. Instead of using that Route Table, we'll create the Route Tables we've got listed in our table, above.
Click "Create route table" in the top-right of the console. You'll get this screen:
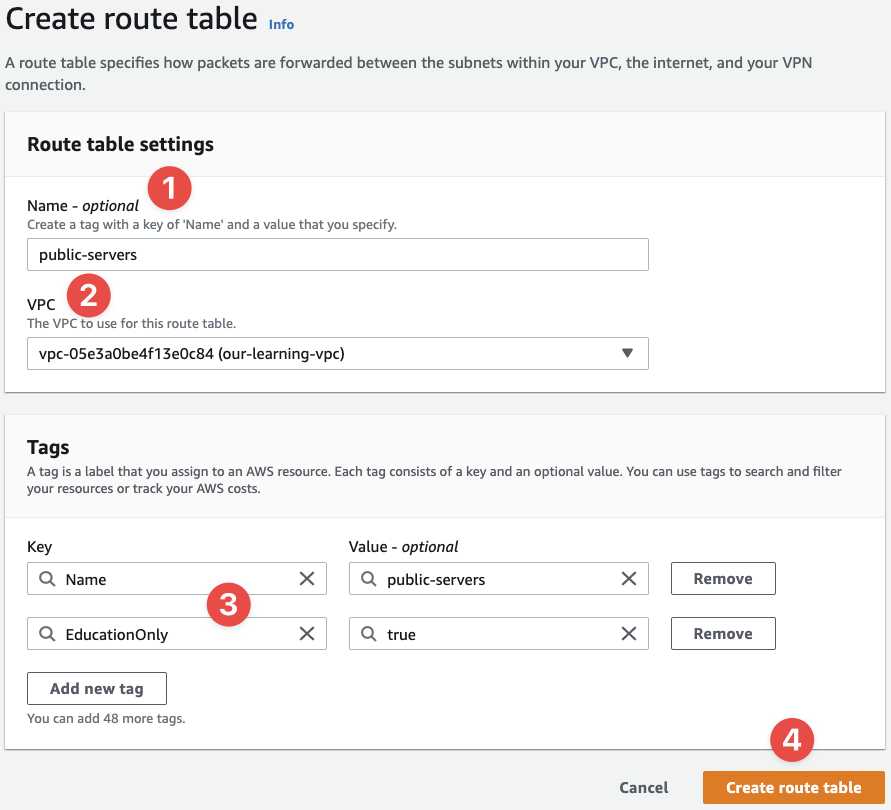
- Provide the name of the Route Table - our first name in the table is
private-servers - Now select the VPC we created earlier (note how the
Nametag is coming into use?) - Assign the rights tags
- And finalise the creation process
When we've created the Route Table, we're taken to the details:
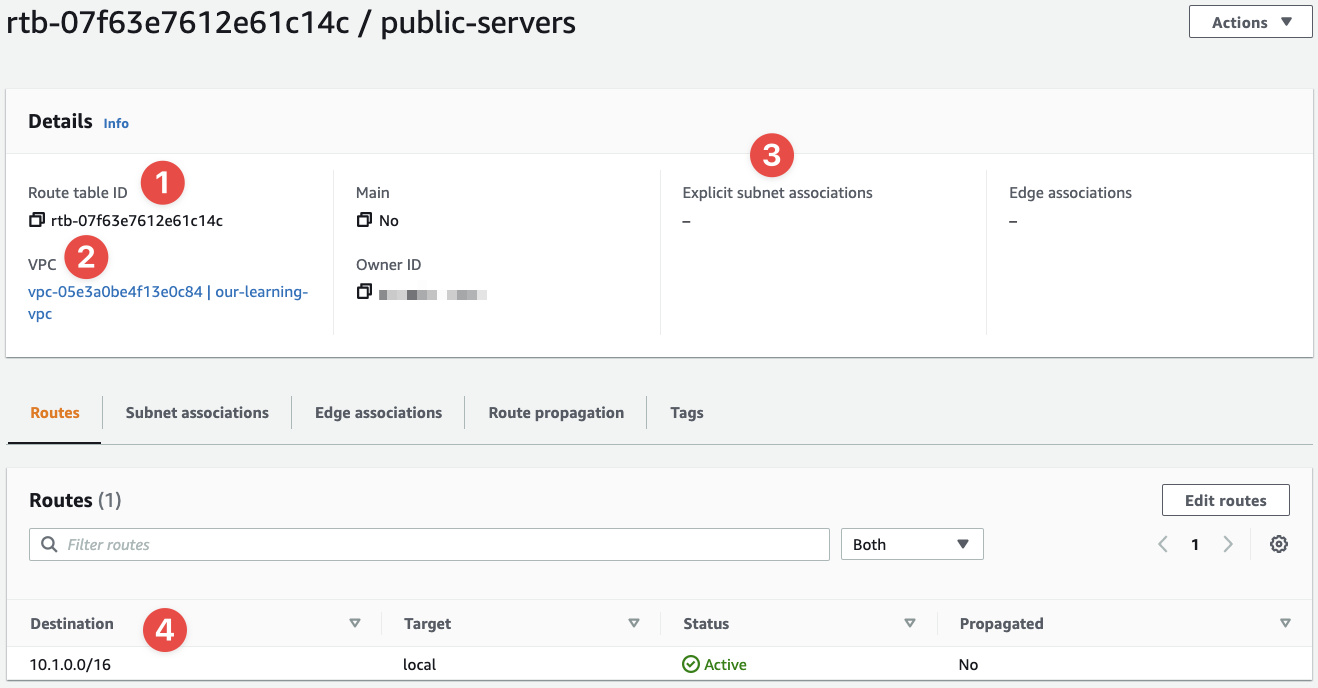
- This is our Route Table's ID
- This is the VPC we've created the Route Table inside of - it'll be available to subnets inside this VPC (remember, one of them is the main Route Table)
- We haven't added any routes to the table yet
Repeat the above process for the private-servers Route Table.
When completed, let's update the public-servers Route Table to have a route to the Internet. Go back to the Route Tables page. You'll see the list of your Route Tables. Select the public-servers Route Table (click the ID) and goto the details page, then click "Edit Routes":
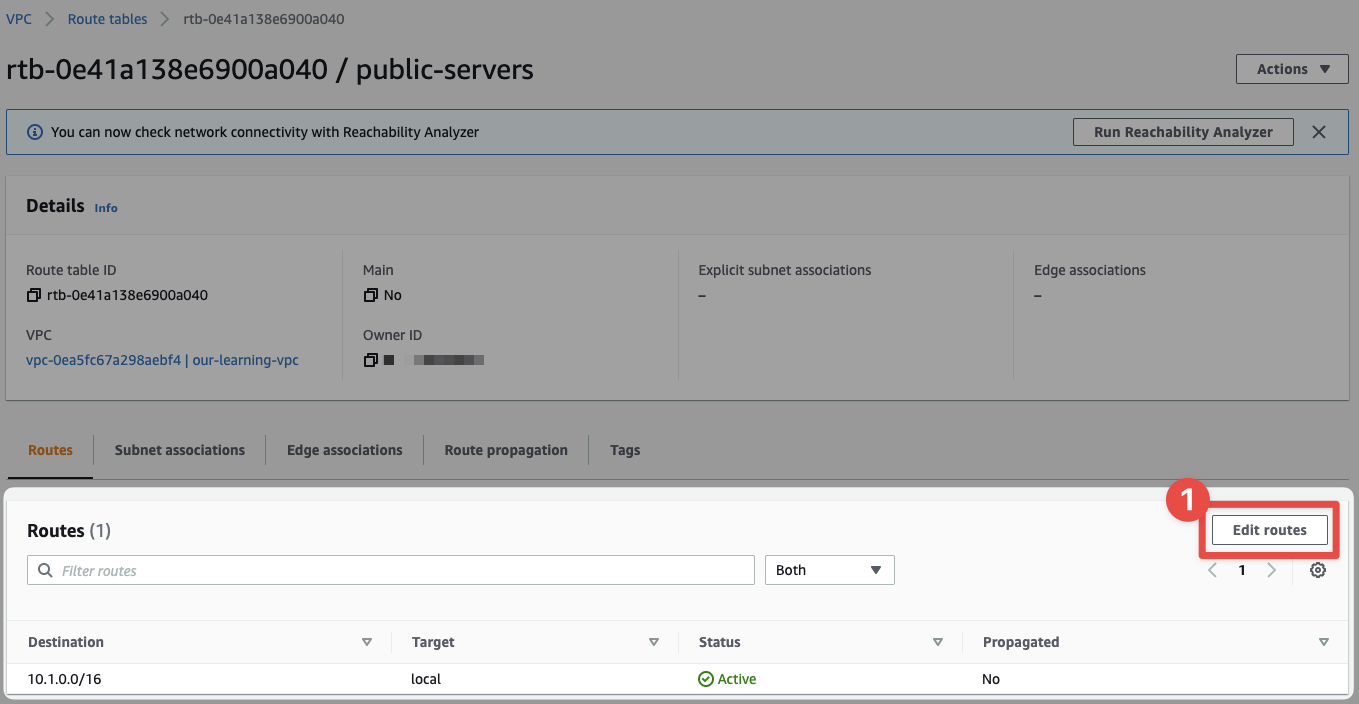
- Click here!
Now we can begin to condigure this Route Table's routes:
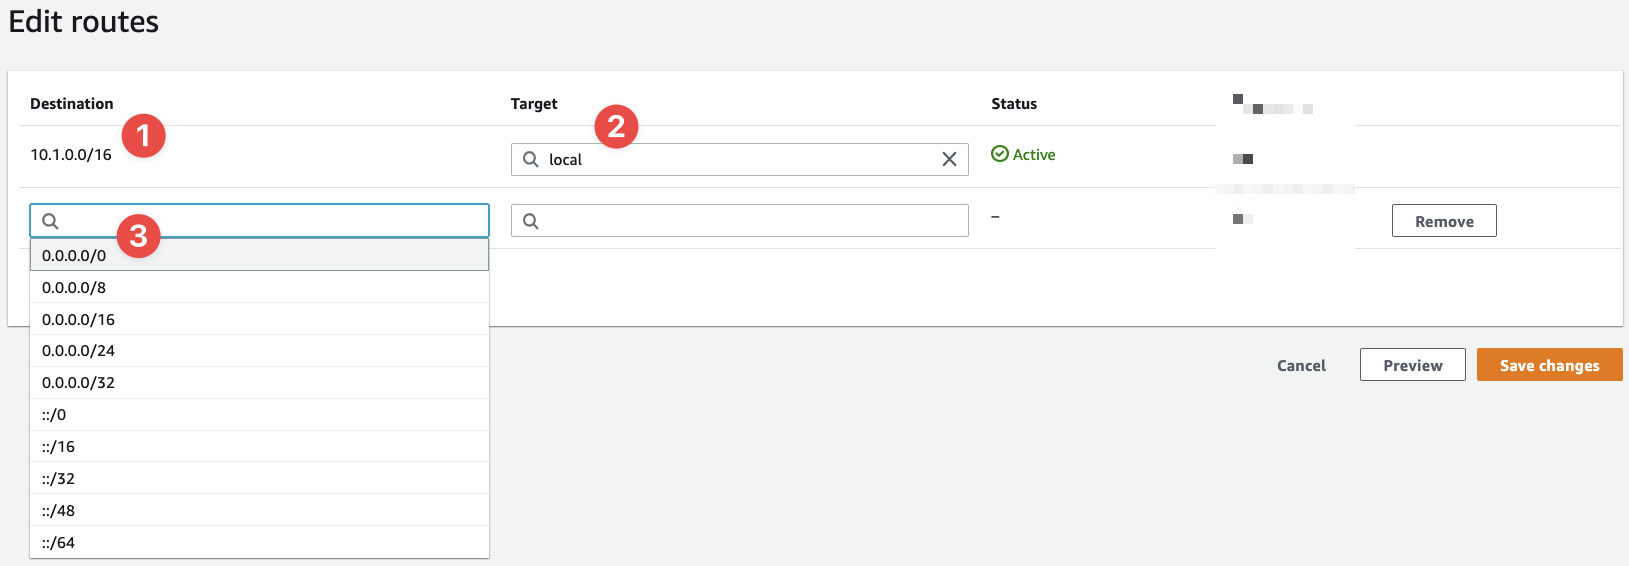
- This is the first rule and it's the default rule that allows the subnet to talk to other subnets inside the same VPC - notice how the range
10.1.0.0/16is the same CIDR range as our VPC - And the target for this default rule is the local network (the VPC)
- This is where we define a new rule's CIDR range
What we want to do is add a rule for 0.0.0.0/0 and we want the "Target" to be our IGW. Let's configure that route:
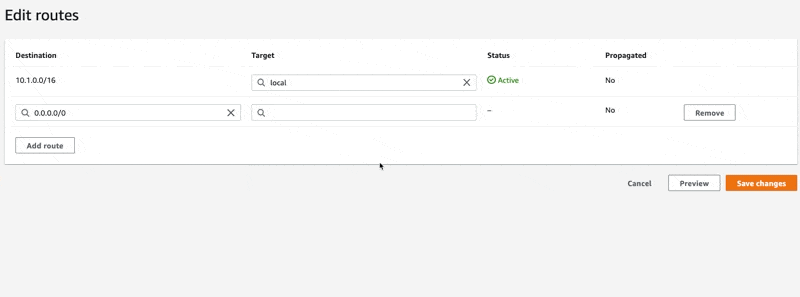
In the screen recording above, you can see how we use the interactive input field to find our IGW. Follow the same motions and configure the route to use our IGW as the target. Finish by clicking "Save changes".
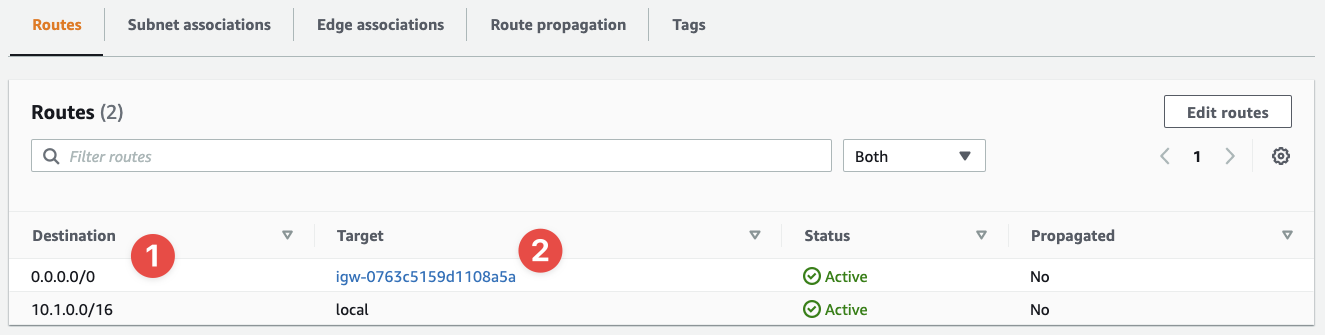
- The destination of this rule is
0.0.0.0/0 - And the target is our IGW
With this rule in place, any connections to any Internet routable addresses will be routed to the IGW we've configured.
This Route Table is now ready to use. Let's attach it to two of our subnets:
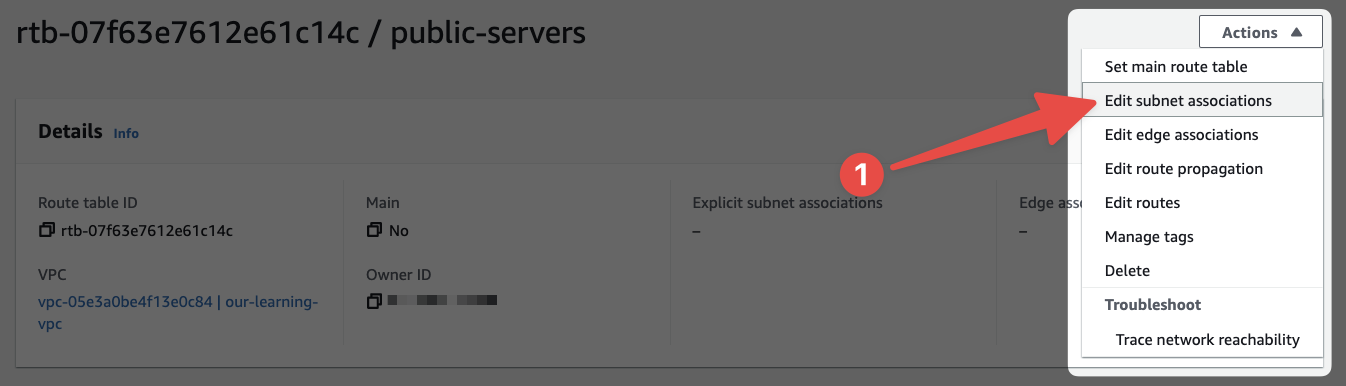
- Select this option to begin the process of associating this Route Table with our subnets.
Now you'll have to select the correct subnets and associate this Route Table with those subnets:
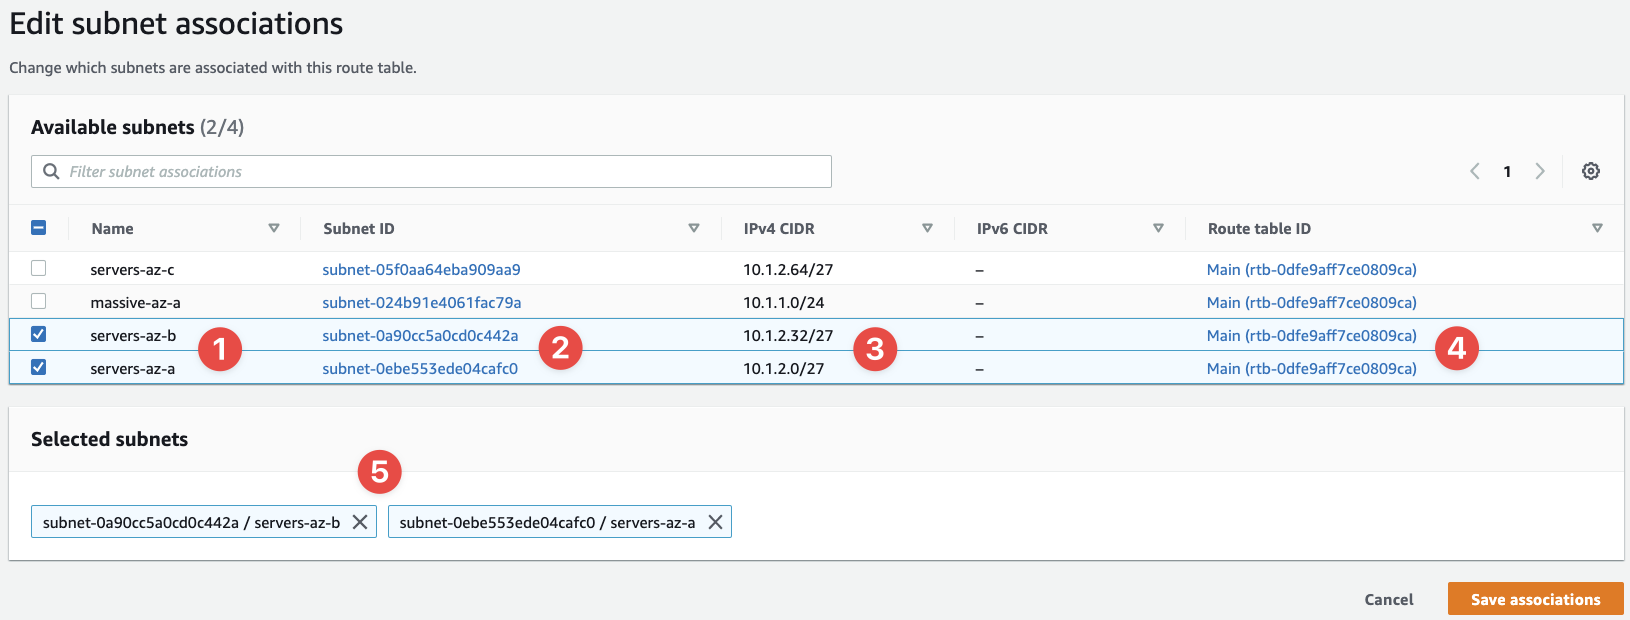
- These are the subnets we should select, as these are the subnets we want to make public
- We can confirm their IDs here
- The CIDR ranges of our subnets can be seen here
- The Route Table ID
- And our selected subnets
You'll notice that this whole page says, "Available subnets (2/4)". That's because some subnets, other subnets in my VPC, already have a Route Table attached to them, so they're not "available" for selection.
Click "Save associations" and we're taken back to the Route Table's details page:
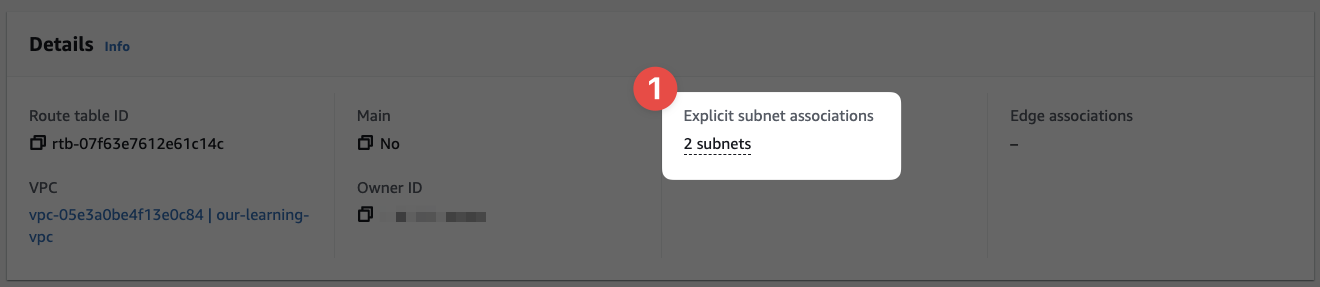
- Here we can see the Route Table is now associated with two subnets
Now you should repeat this process for our second Route Table and associate it with subnet servers-az-c.
You're done with the basic networking configuration. We can now finalise this section by demonstrating everything with done with a quick EC2 instance and then some clean up tasks.