Internet Gateways#
With a VPC and some subnets, we have everything we need to organise our resources at the networking level (and at a security level, too.) But left as is, the VPC and subnets aren't much use to us based on what we need to do. In an enterprise environment, that wouldn't be the case and private networks are common, but for us, we're building something that isn't private nor is it in an enterprise environment.
Warning
It's worth saying this again (and again, and again, ...) that AWS services cost money, especially those connected to the public Internet. Additionally, when we create Internet facing resources, like EC2 Instances, we introduce a security attack vector into our network/account. Follow my instructions carefully, please.
We will now introduce a new AWS resource: the Internet Gateway (IGW). An IGW is responsible for routing traffic from the public Internet and into our network, which in turn then routes that traffic to a resource, like an EC2 Instance. The IGW can also be used to route traffic from the internal network, got to the public Internet (and back again.)
An IGW is attached to yout VPC and is a highly redundent service. They're not bound to a particular AZ, and so they don't fail if an AZ goes down.
Let's visualise this:

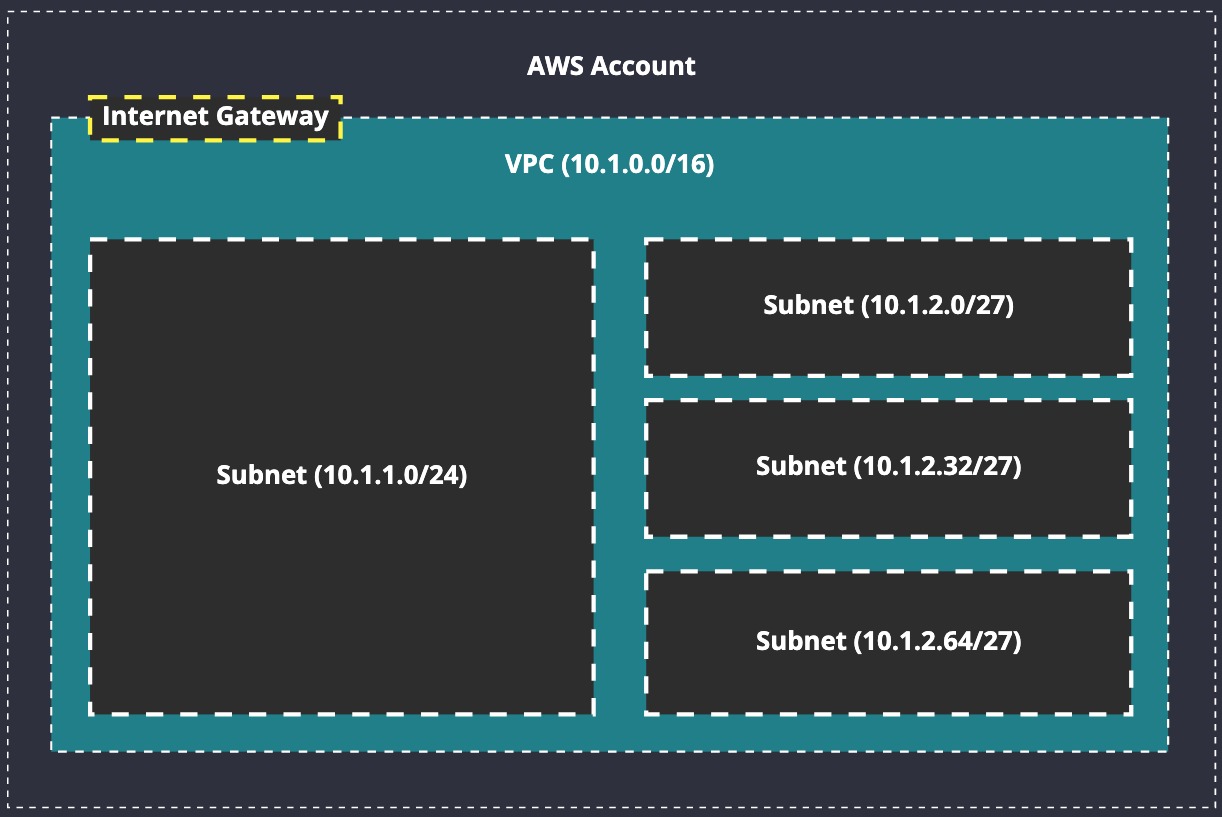
We can see in our updated diagram that we've added an IGW to the VPC. Now what? On its own, this does a lot for us (behind the scenes, at least), but it's still not enough to get the job done. We have to create Route Tables, something we'll explore soon, so that we can send traffic to the IGW when we're trying to reach an Internet routable address.
Visually, traffic flow looks something like this:
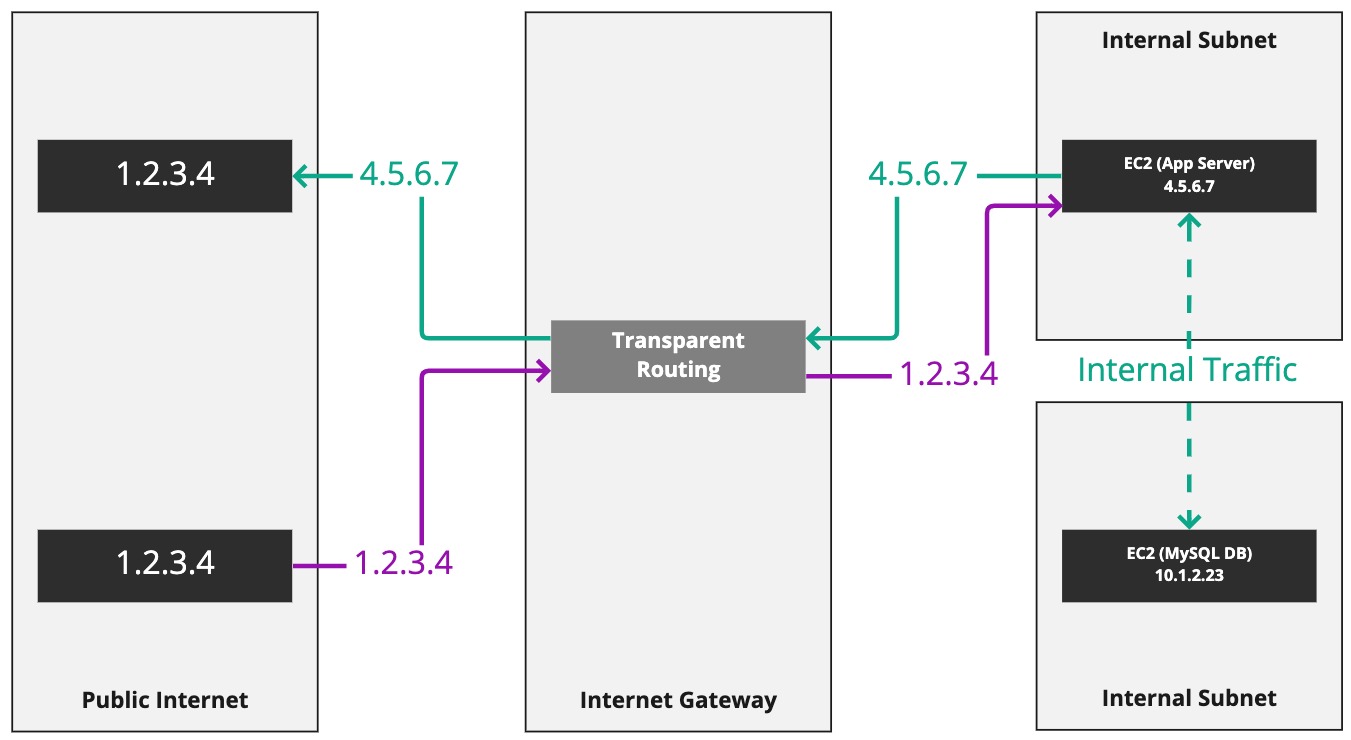
Look at the server on the right called "App Server". It has a public IP attached to it: 4.5.6.7. The server is making a connection to 1.2.3.4. This connection is being routed to the IGW, which is transparently routing the connection for the server. We can also see that the IP 1.2.3.4 makes a connection to IP 4.5.6.7, and this is also enabled and transparently routed by the IGW.
This will become more clear as we setup our network and start creating servers.
For now, let's create an IGW in our AWS account and then as we progress through this section, it will become more obvious and clearer what an IGW is doing and how it's used.
Creating an IGW#
Make sure you're still logged into your AWS account as the network-admin user, or login again if your session has expired. Now head over to the "VPC" section of the console.
On the left, you'll see an option called "Internet gateways" - click this.
Note
You'll notice that Route Tables is above Internet Gateways, implying it comes first. I'm going teach you this stuff the other way around: create the IGW and then create a Route Table that can refer to it straight away.
You'll get a list of IGWs, and at most you'll have one (default IGW). We're not using the default infrastructure that AWS is providing as we need to learn to make this stuff ourselves.
Click "Create internet gateway" in the top-right of the console and let's get outselves an IGW:
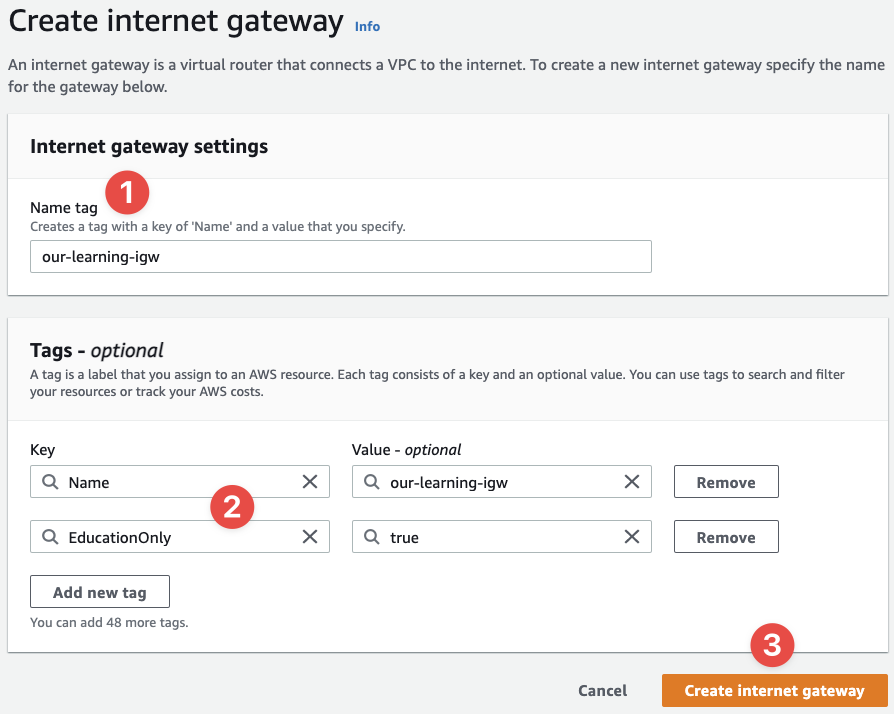
- Simply provide a name for the Internet Gateway (technically it's optional):
our-learning-igw - Supply the relevant tags for later
- And click "Create internet gateway"
And that's it. You're done. Here are the results I see after the task is completed by AWS:
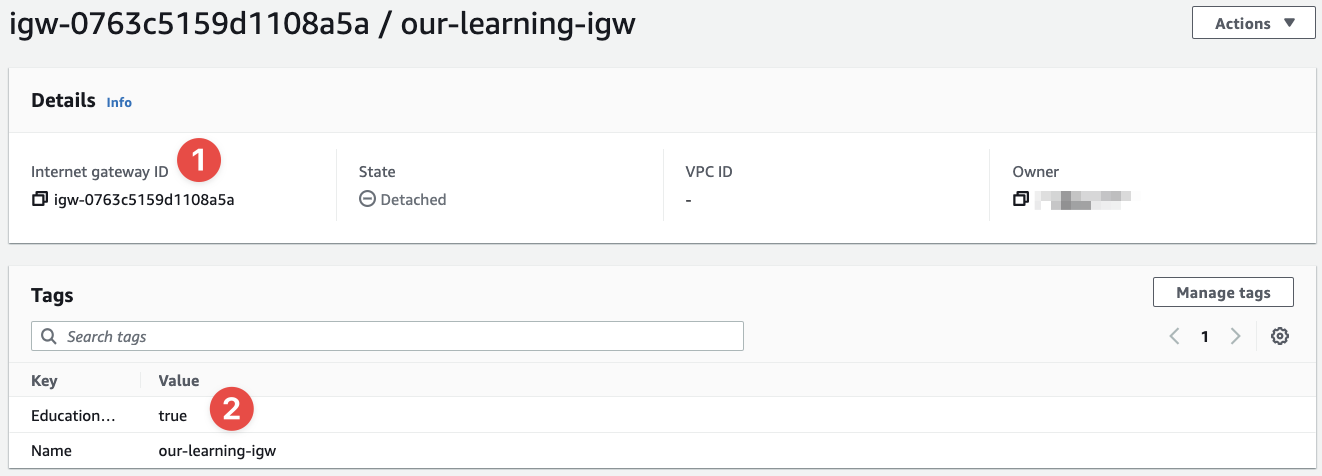
- This is the ID of the Internet Gateway
- And here we can see the tags we've applied to it
Seriously, that's it. We have an IGW now. What's next is to use it by attaching it to our VPC, just like in the diagram we looked at above.
To do this, click "Actions" in the top-right of the console:
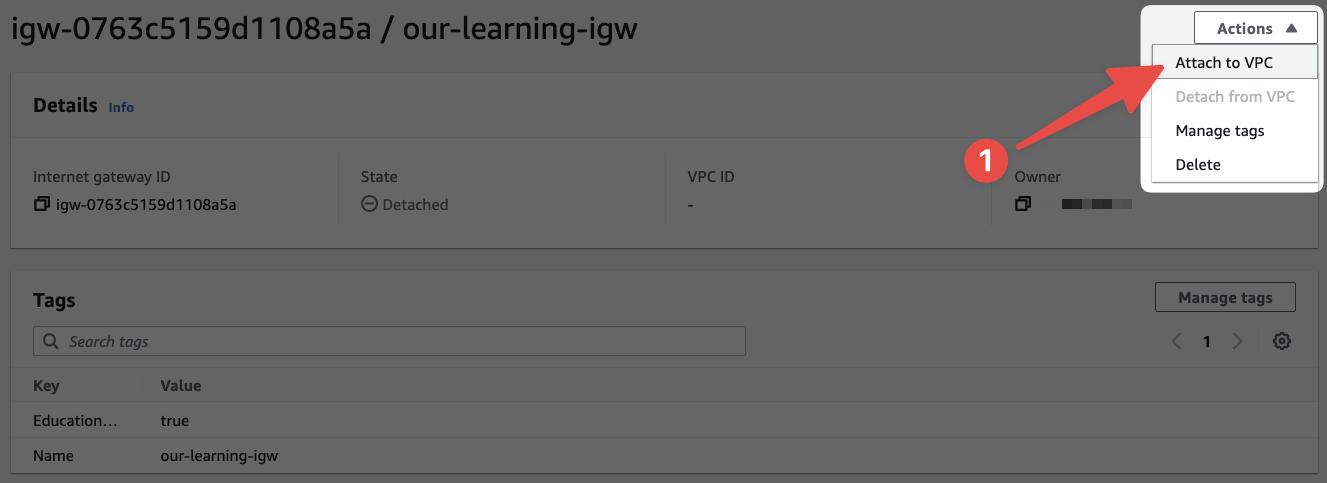
- Then click "Attach to VPC"
Next we'll see this screen:
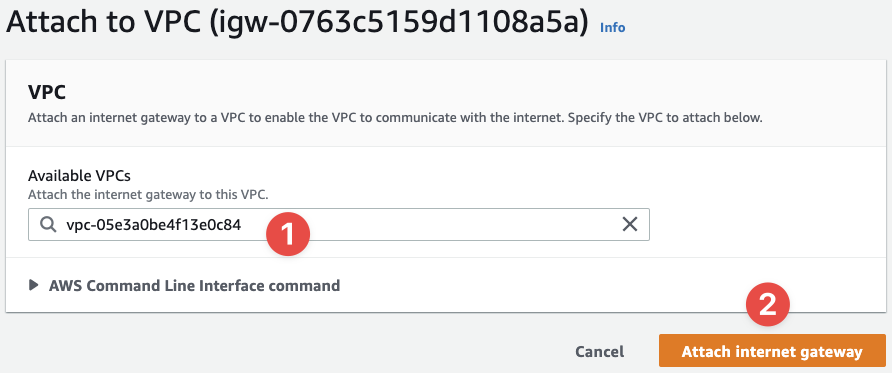
- Select the VPC ID that we created earlier (note that you'll need to know the ID - this is why the
Nametag is useful) - And finalise the process by clicking "Attach internet gateway"
Finally, checkout how the details about our IGW have now changed:
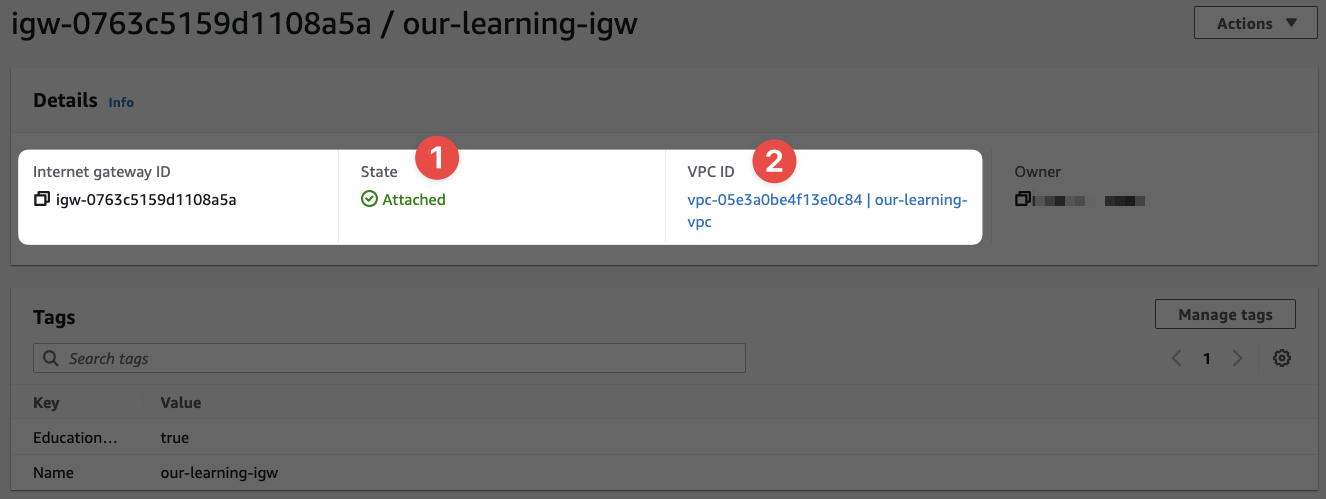
- The state is now attached, because we've attached it to a VPC
- And this is the VPC ID we've attached the IGW to
IGWs are as simple as that (from our persecptive as users.)
Now we're going to explore a second option called a NAT Gateway (NATGW) and an alternative option.