Policies#
Now things start getting really serious, and more complex. AWS IAM policies can be simple or very complex. We'll keep things simple, but there are serious things we have to know about with regards to IAM policies.
Simply put, an IAM Policy is a set of rules that define what you can do inside of an AWS account and against what resources. A policy can be an identity based policy or a resource based policy.
Let's get more technical and break up a policy into the following.
Who, What, Which, When#
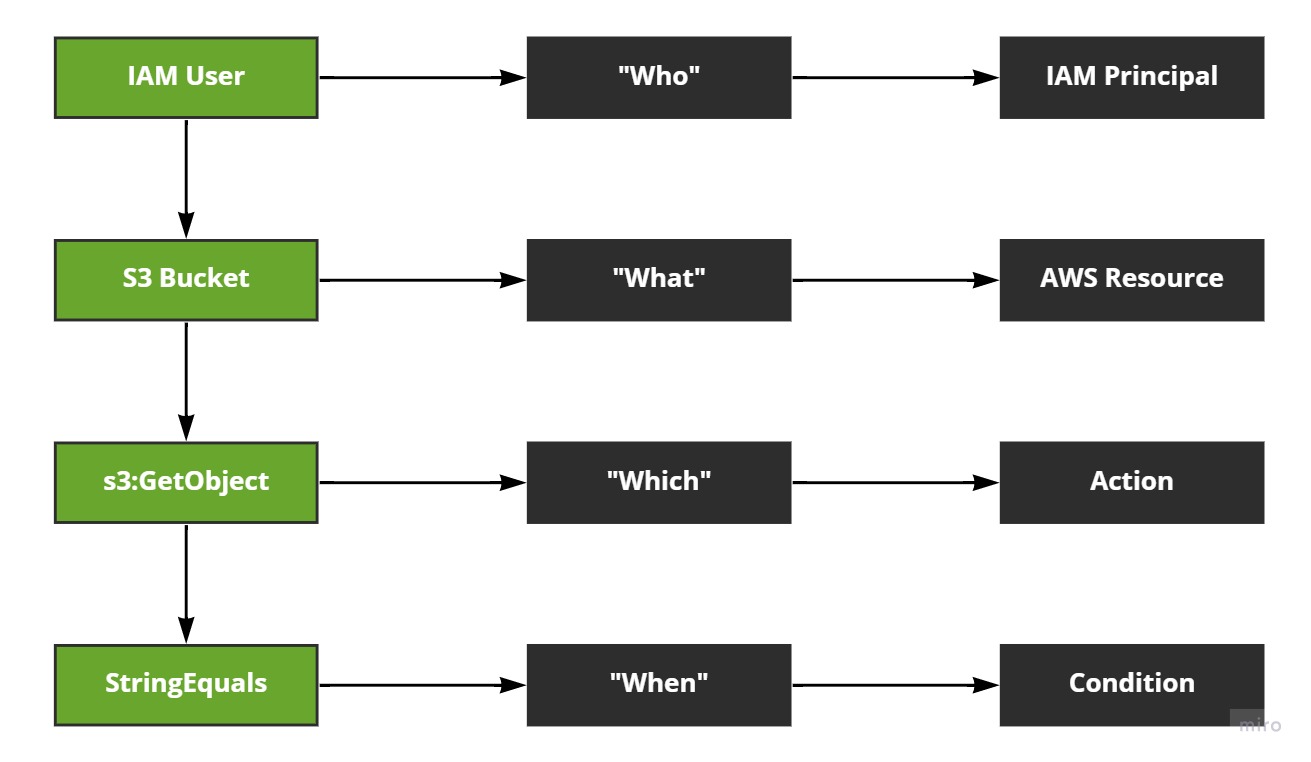
An IAM Policy defines who can do what, against which resources, when the policies conditions permit it.
The who is the IAM Principal - the IAM User or IAM Role. Groups and Policies aren't Principals. A Principal is basically a person or application that makes requests to perform actions against resources using an AWS account.
The Principal (who) performs actions against an AWS account, the what. The what, the actions, are things like, "Get an object from an S3 Bucket" or, "Reboot this EC2 Instance." Such actions are permitted (or denied) inside of an IAM policy and then attached to a Principal (identity policy) or a resource (resource policy).
When the what (actions) are performed, they're performed against the which, or the resource the Principal (who) is trying to manipulate in some manner.
And finally we use the when, or conditions, to say when a Principal can perform what actions against which resources.
Let's visualise this:
Example Policy#
Let's look at an example IAM Policy and then bridge the gap between an actual JSON policy and the concepts above.
1 2 3 4 5 6 7 8 9 10 11 12 13 14 15 16 17 18 19 20 | |
And if we annotate the above code, we can see where the "who", "what", "which", and "when" fit in:
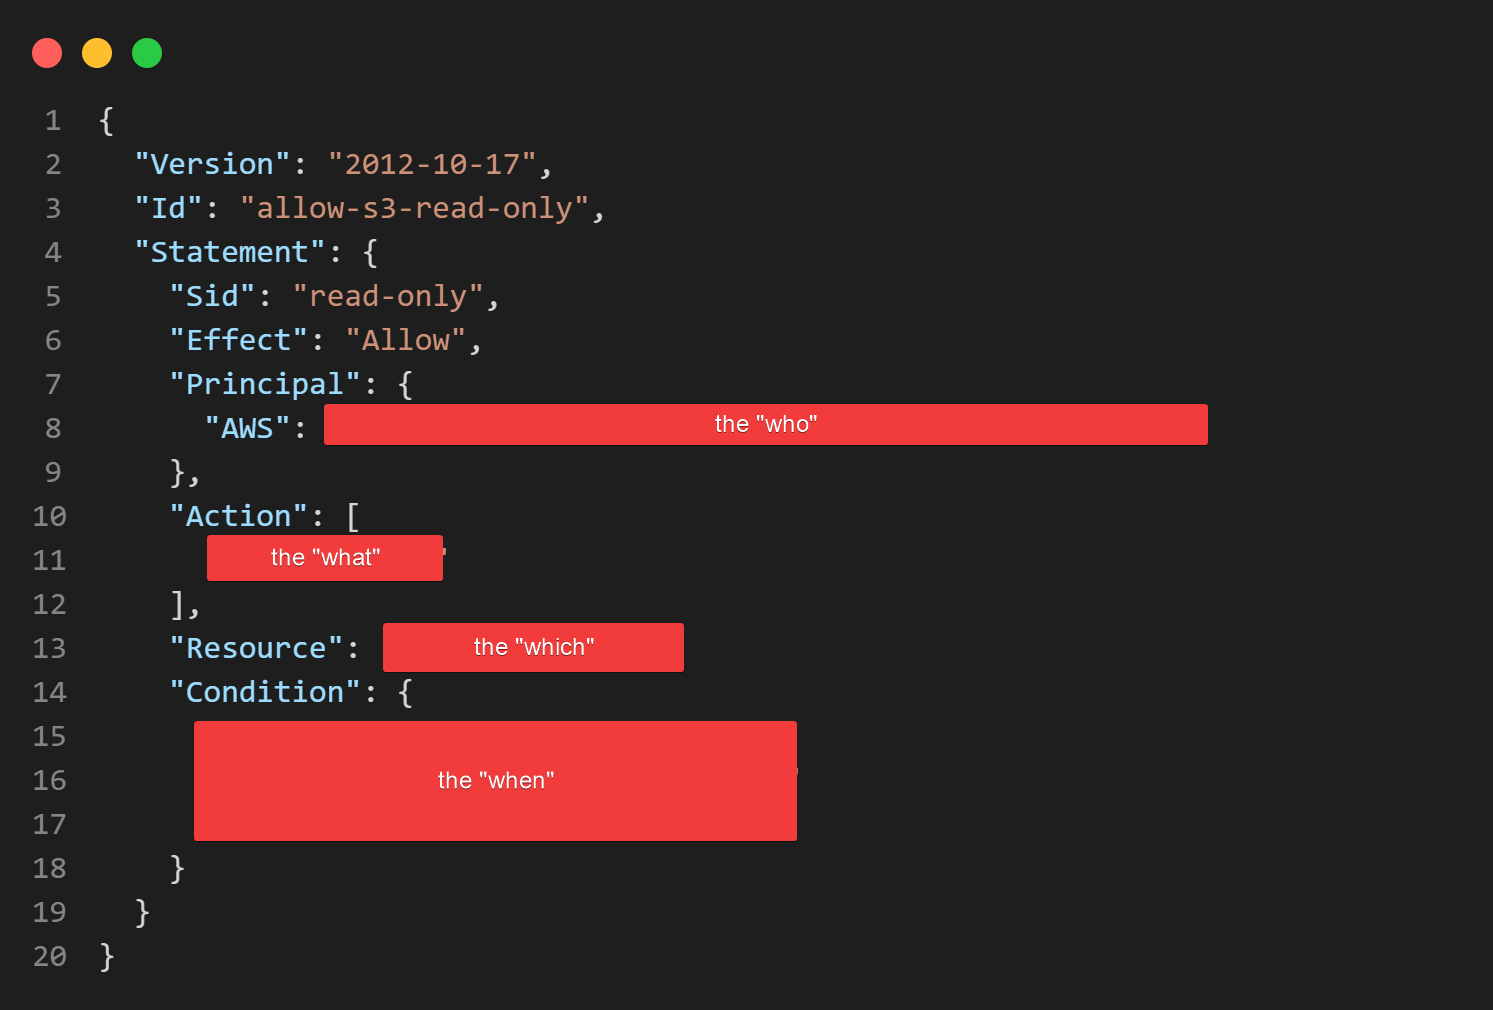
I've taken a screenshot of the JSON and marked out the areas of the policy that relate to the abstract concepts we talked about earlier.
Inside the JSON document, these are the Principal, Action, Resource, and Condition keys. So now we know what an IAM Policy is doing for us, we can actually breakdown that policy and understand what these keys mean.
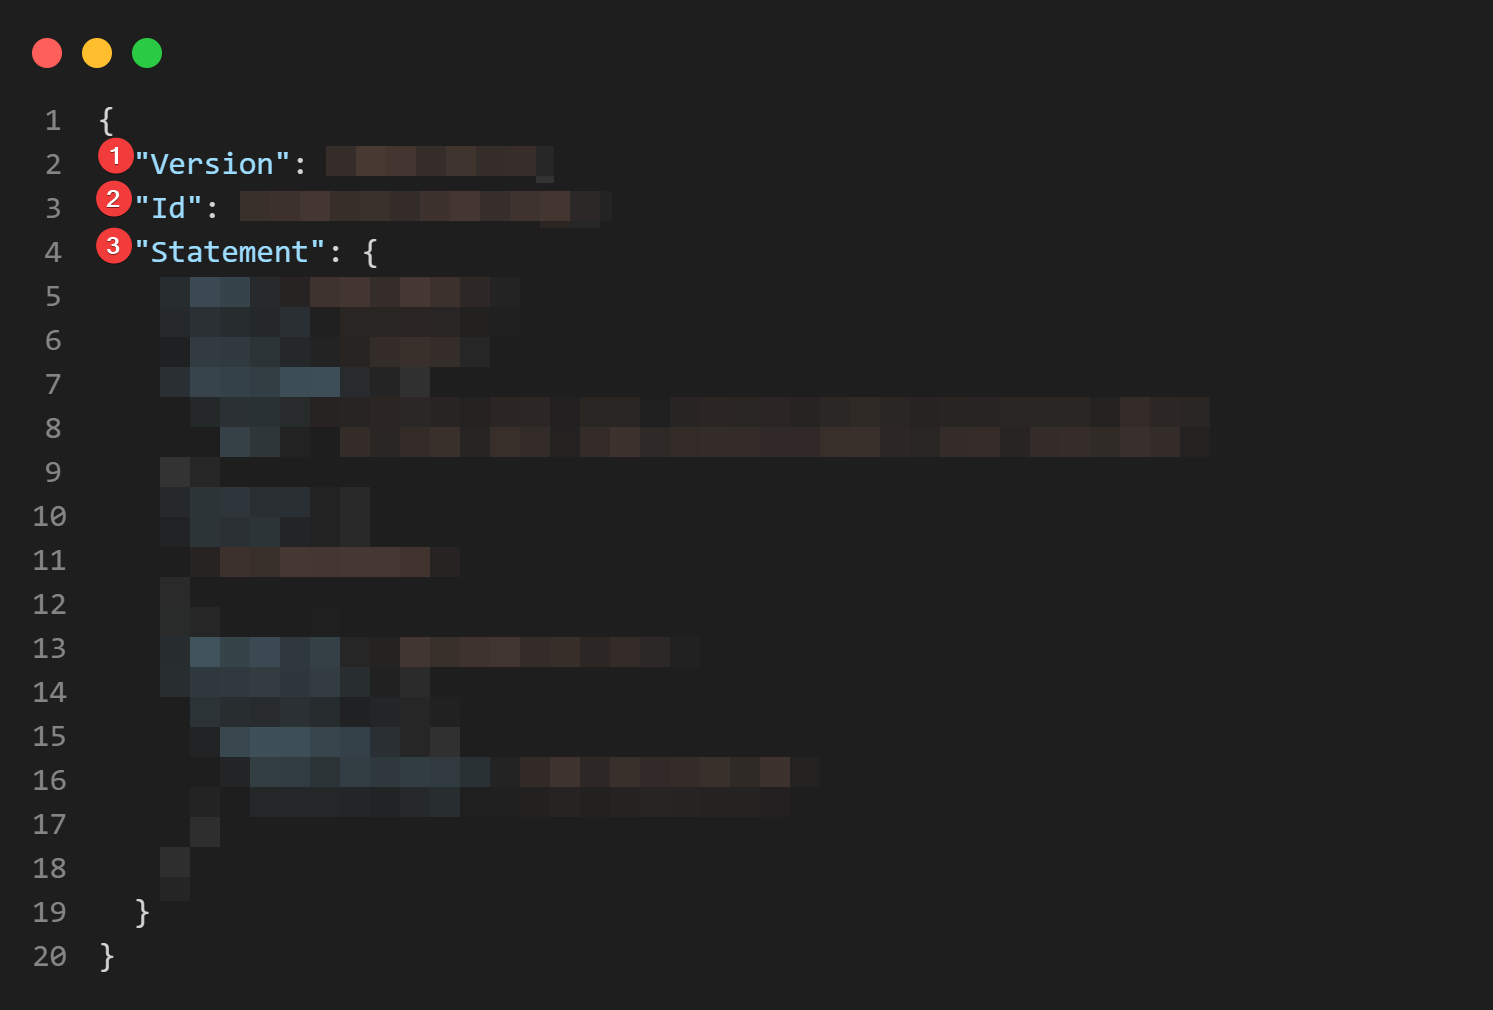
Before that, however, let's look at the same policy, but with a new set of annotations over it.
Top level policy structure#
First, let's breakdown the top level keys inside of the JSON document: Version, Id, and Statement:
- The
Versionkey is used to define the IAM Policy language used in the document. There are only two versions at this point in time:2012-10-17and2008-10-17 - The
Idkey provides a unique ID that identifies this specific IAM Policy. You should make sure this is unique across your account. Using aUUIDis recommended - And the
Statementkey can be an array or list of elements, or a single element. We're using a single element in our policy above
So the Version key should always have a value of 2012-10-17. Never use the older version. There's simply no reason to.
The Id key should be unique across your account (ideally). Just stick to this simple rule and it'll prevent issues in the future.
Note
You can generate UUIDs easily enough online (https://www.uuidgenerator.net/) or via a Python 3 one-liner (you should have Python 3 installed locally after the programming section):
1 2 | |
The Statement key, or element, is the most interesting and important part of the policy at this level. It can be an array/list of elements, or a single element. Here is both as a visual only example (this is invalid JSON):
1 2 3 4 5 6 7 8 9 10 11 12 13 14 | |
Note
This is invalid JSON as we have two (2) "Statement" keys, which is a conflict.
Notice the first "Statement" key uses [] to define an array of {} element, but then second simply defines a single element using {}.
What goes inside the statement is where the fun begin.
Statement level policy structure#
Now let's go into the "Statement" key and do the same thing again: look at the top level items.

- The
Statementkey, of course, which allows us to define a statement or array of statements inside the document - The
Sid,EffectandPrincipalkeys; theSid(StatementID) being a unique identifier for this statement, inside of this policy; theEffectbeing eitherAlloworDeny; and thePrincipalbeing the IAM Principal this statement applies to - The
Actionis what action or actions are being permitted or denied - The
Resourcedefines what resource or resources theAction(s) can be applied to - And finally the
Conditionallows us to define some pretty complex conditions around the overall request to perform additional conditional tests
There's quite a bit to take in here. Let's go over each part a bit more.
Sid#
This is the statement ID. It should be unique inside of the policy, but also human readable. So don't use a UUID, but a human readable name, like s3-readonly-access.
Even though some services don't require the Sid to be unique, some do, so just get into the habit of making them unique to avoid collisions in the future.
In our example policy, I use read-only. Easy to understand and simple.
Effect#
This is either Allow or Deny, and defines whether or not the actions you like under Action are permitted or denied. When we talk about how IAM evaluates policies, we'll come to understand this much better.
By default Effect is set to Deny, which should tell you something about AWS' default security model: deny everything until something Allows it.
We're Allow-ing the action(s) in our policy:
1 | |
Changing that to Deny inverts the entire policy to block the Action against the Resource when the request comes from the Principal.
Principal#
You will use the Principal field to define who or what is given permission (or denied permission) to run the Actions against the Resources. Basically: who do you wnt to apply the permission to? An IAM User? an IAM Role?
The Principal key is required for resource-based policies. We'll come to understand this better later on.
Note
This can get complex pretty quickly, and will require experience and time to get good at. There are nuisances to understanding when you use a Principal field that can only come with extensive reading of the documentation and experience.
In our example Principal is:
1 2 3 | |
The "AWS" means we're referring to an AWS account, along with the ARN that identifies that account. There is scope to learn a lot here and it can get complex, quick, hence my note above.
This will come with more time and we'll explore options as we move on.
Action#
You use an IAM Policy to define what can or cannot be done with or against a particular resource. The "what" is the Action, and because there are so many AWS services there are also thousands of possible actions you can provide here (and things you can do make it easier to manage them.)
The Action key can be a single action or an array/list of actions, like we saw with the Statement keyword earlier. We'll cover this in more detail when we come to create actual policies. It's actually not that difficult to understand - there are just a lot of services and actions.
Our example policy uses an Action of ["s3:GetObject"], which is a list of actions. Technically it could be Action: "s3:GetObject" and the result would be the same.
The Action we're Allow-ing is s3:GetObject, which permits the Principal to get objects from S3.
Resource#
And now we finally get to define what the policy is targeting. This resource or array/list of resources is what the Action targets, and what the Effect either Allows or Denys. This is where you specify the ARN of the resource or resources. That's why ARNs are important to understand - they're used to identify resources across your entire AWS account.
In the example policy, we define the resource as:
1 | |
Which means all S3 Buckets and objects inside those Buckets. We can limit this down using wildcards and more, something we'll explore in a later section.
Condition#
The final key in our policy is the Condition key. This is where you can define some pretty complicated rules that help define when the policy comes into effect. This is an optional key/element, and you'll absolutely see policies that have no conditions placed on them.
Here's the format of a Condition:
1 2 3 4 5 | |
There are quite a few condition-operators available, from checking the username of the permission trying to use the policy, to their IP address, through to the time of day down to the second. This can get complicated, fast.
In our example policy, we set one Condition (you can add multiple):
1 2 3 4 5 | |
So the condition-operator is IpAddress; the condition-key is aws:SourceIp; and the condition-value is 100.10.01.33/32 (a completely random I made up.) All of this means that the policy comes into effect, and applies to the request, when the request comes from that IP address. If it does not, then the policy does not apply.
The Not keys#
So we've seen the Principal, Action, and Resource keys (or elements, as the AWS documentation calls them), but there's another version of them that allows you to flip the logic around. They are, NotPrincipal, NotAction, and NotResource.
In the case of NotPrincipal, this is like saying, "If you're not this principal, then the policy applies to you." For the NotAction, you're saying, "If your action is not one of the actions listed, then the policy applies to it." And the same for the NotResource - every other resource than the one stated.
So this inverts the logic of the policy, turning the policy into a black list (block) rather than a white list (allow).
Summary#
Now we've got a good idea of what an IAM Policy looks like, how it's structured, how we can add elements to it, and a bit more. We'll move on from policies at this point, but trust me when I say we'll explore them in more depth very soon.