Key Pairs#
When you create an EC2 Instance, it's very highly likely you're going to want to remotely manage it after the fact. It most organisations, SSH or RDP access is required to provision or configure a server after it has been created. To achieve this, we use Key Pairs.
Note
There's also AWS Systems Manager, which can provide a very clever way to access systems without using SSH or RDP, but this, again, provides a degree of vendor lock-in that might be desirable to most organisations. SSH and RDP provide Cloud agnostic management options.
That being said, it's certainly possible to open or SSH/RDP access later on if desired or there's a need to move to another provider.
Info
It's actually possible to have servers that self-provision themselves and then never allow external access via SSH or RDP. This is a common practice and is usually combined with a read-only filesystem, making it very difficult to download and execute malicious code on the remote server. That's a very advanced topic, however.
EC2 Key Pairs are created within your AWS account, and are region specific. They consist of two parts: a private key and a public key. We've explored this concept already when we looked at SSH Keys. The idea is basically the same and you are, in fact, generating the exact same type of key pair with an EC2 Key Pair.
The Key Pairs you generate have their public component "injected" into Linux/Unix based EC2 Instances as an "authorised key" - an SSH key that's allowed to connect to and authenticate as a particular user (we're covered this previously too). Once in place, you can then use the private component to SSH into that Instance and start to remotely manage it. You've had experience of doing this already, which is why this course went over systems administration before getting you to this point.
When you deploy an Instance using Windows Server, the public component of the Key Pair is used to encrypt the Administrator user's password. Using the console (or CLI/API), you use the private component to get that encrypted value and then decrypt it. Using the password, you can RDP to the Windows Server, login, and manage it as you see fit.
Note
Windows Server 2019 and beyond can be configured to use OpenSSH and permit remote SSH connections, but that's not supported by AWS as a means of accessing a newly created Instance.
Before you can deploy any EC2 Instances to AWS, you must create a Key Pair first. Let's do that now.
Creating a Key Pair#
Login to the console and head to the EC2 section. Under "Network & Security", you'll see "Key Pairs":
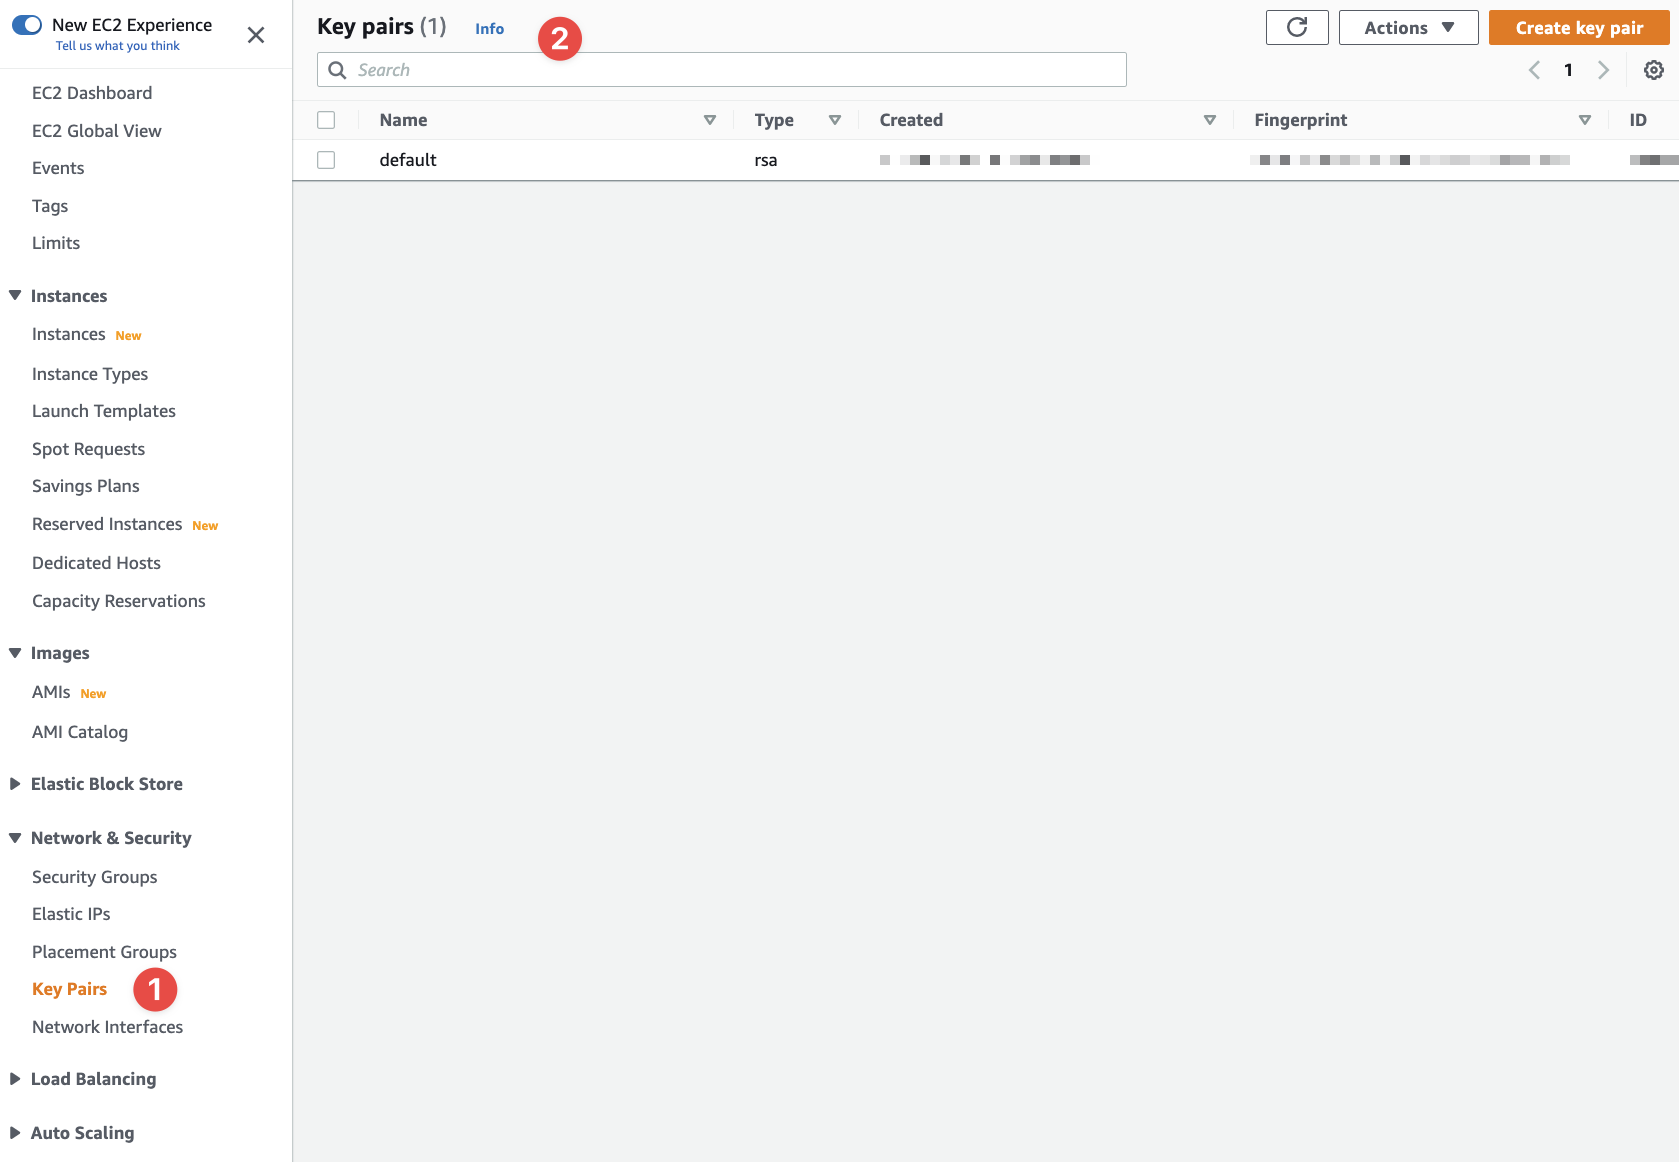
- Access the Key Pairs UI here
- And here we can see any existing Key Pairs (probably none for you)
I have an existing Key Pair already that I use as a default Key Pair.
In the top-right, click "Create key pair":
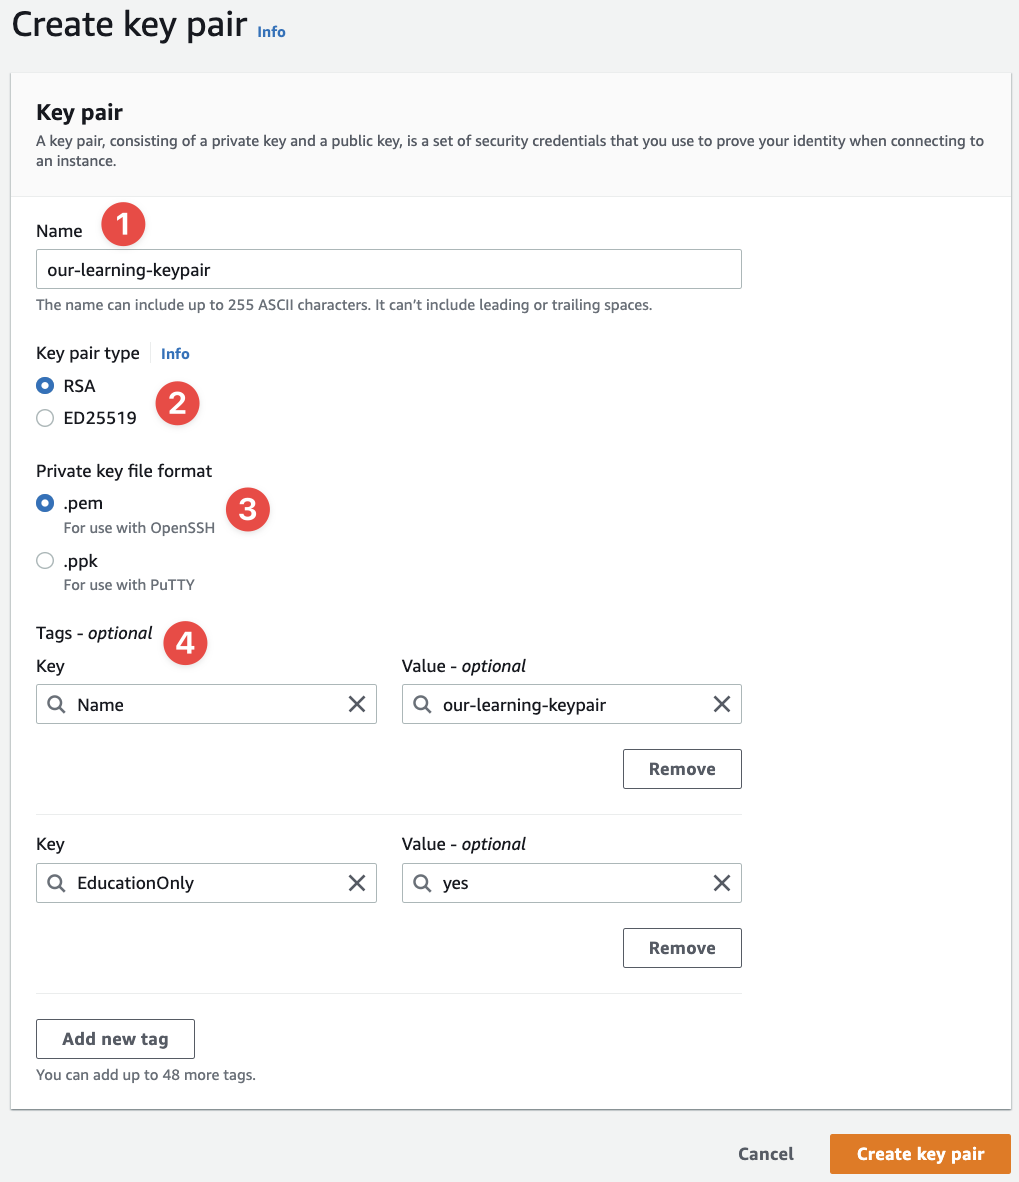
- Name it something we're familiar with
- I've selected
RSA - The
.pemformat is probably the most useful at this point in time - And the usual tags
The use of RSA and .pem simply boils down to compatibility. macOS, Windows 10/11, and Linux all support OpenSSH and the SSH client you get with OpenSSH supports .pem and RSA keys. ED25519 is more secure than RSA, but it's not usable for Windows Server, so I stick to RSA for the time being.
Once created, the console will do a few things:
- It'll forward you back to the Key Pairs page that lists your Key Pairs
- And it'll send your browser a file to download: the
.pemfile it generated
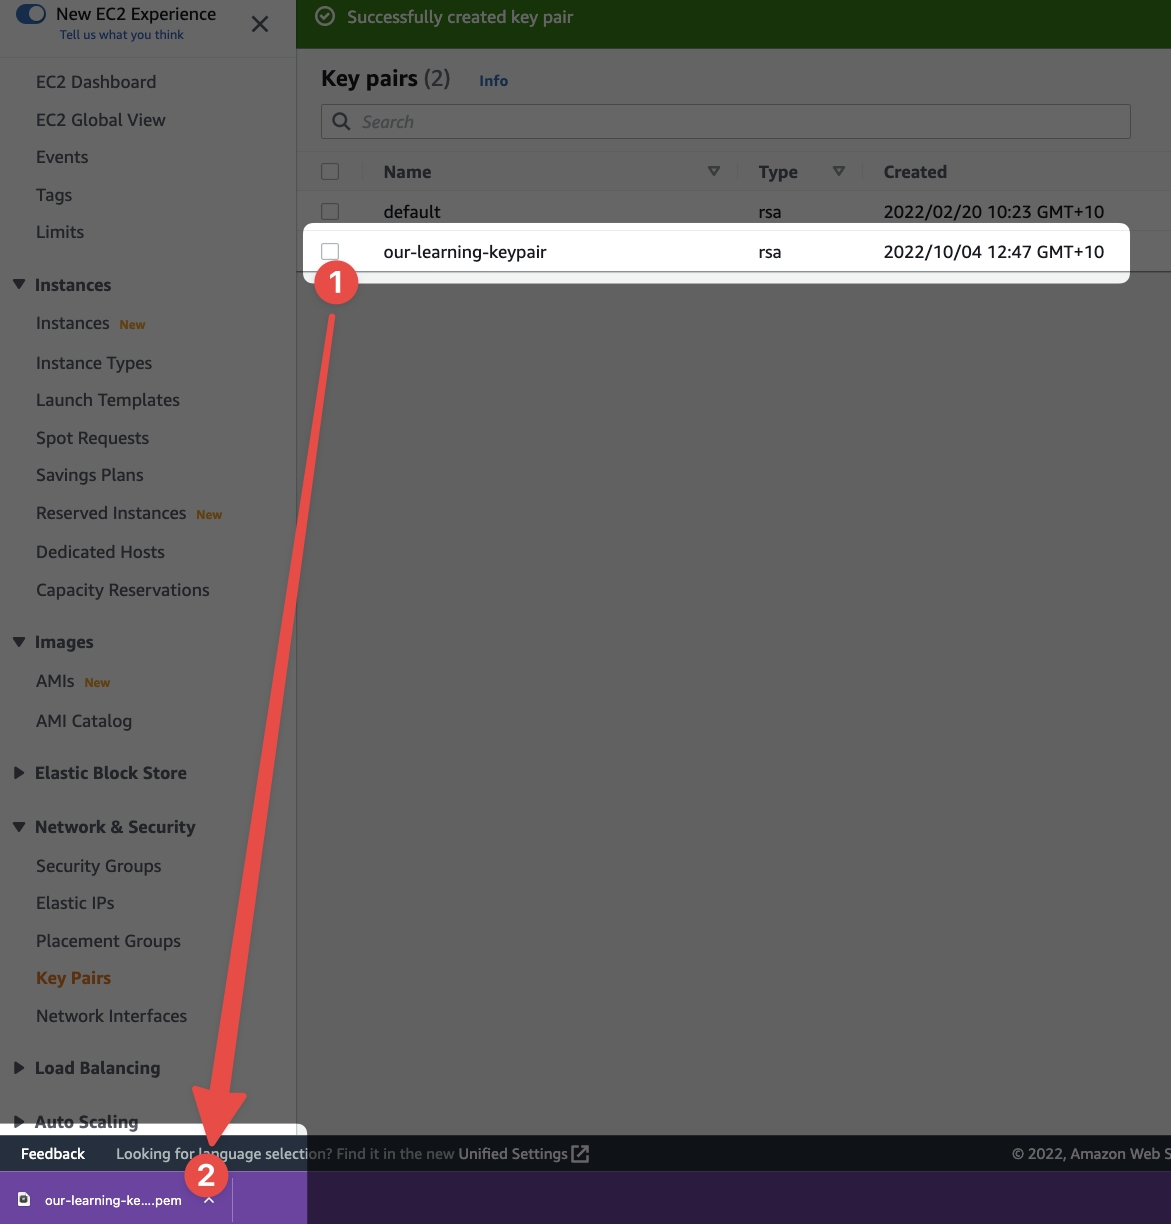
- Our key as we expected
- The
.pemfile containing the private component
This is what a .pem file looks like:
1 2 3 4 5 6 7 8 | |
I <redacted> a lot of the key's content as it's obviously just random "garbage" from our perspective.
You'll need to save that .pem in a password manager. I recommend 1Password.
Now if you're going to use that PEM file to SSH into Linux/Unix hosts, then save it somewhere secure on your local file system (as well as in a password manager.) You can use it with the ssh -i </path/to/file> command on macOS and Linux (and Windows 10/11 once you have OpenSSH installed), allowing you to connect to your hosts.
For Windows Server EC2 Instances, you can use the AWS CLI tool to fetch the Instance secret or the console. I recommend using the console and then saving the passwrd in - you guessed it - a password manager.
Password protection#
I also highly recommend you configure the SSH key to have a password (basically, you encrypt it) so that you need the password to use the key.
Note
You cannot do this if you intend to use the private key to provision Windows Server Instances as the console/CLI cannot decrypt the PEM file before using it to decrypt the Instace's password. You have no choice but to leave it unencrypted at this point.
Once you have an OpenSSH client installed (not required on macOS or Linux/Unix), then you'll have access to the ssh-keygen command. To add a password to a PEM file, simply do this:
1 | |
Now you'll be provided with a prompt that will ask you to type in a password. Do this twice and you're done. Easy.
Creating your own Key Pairs#
Of course, it's possible to generate your own Key pairs using ssh-keygen and simply uploading the public component to AWS. Let's do that.
Open up a terminal/console on your system. I'm going to use iTerm2 on macOS, but you can use Terminal.app (on macOS), your preferred terminal emulator on Linux/Unix, or Console.exe or a PowerShell terminal on Windows 10/11.
Once open, generate an SSH key pair:
1 | |
Follow the prompts:
1 2 3 4 5 6 7 8 9 10 11 12 13 14 15 16 17 18 19 20 | |
Now I have two new files: my_second_keypair and my_second_keypair.pub. The .pub file is the public component and it's this that you upload to AWS. The other file is, obviously, the private component.
Going back to the AWS console, you simply click "Actions" and select "Import key pair":

- Click this...
Now fill in the fields and click the "Browse" button. You'll then be asked to navigate to and provide the my_second_keypair.pub file (the public component). Select the file, provides the tags, and click "Import key pair":
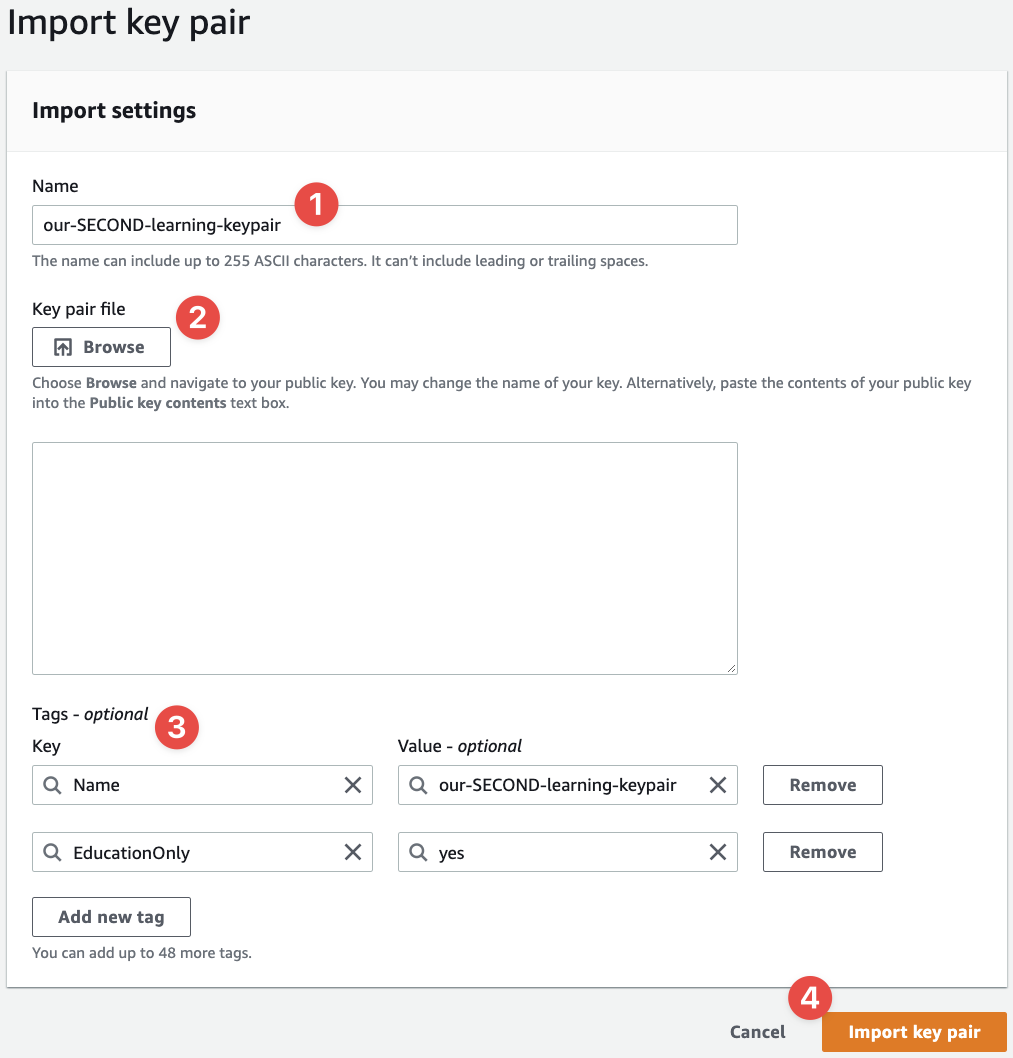
- Our key name
- Browse to and find the public component of the key pair
- Provides the tags
- And this time we're importing the key
And that's that. You now have two Key Pairs you can use when provisioning EC2 Instances, which you can now safely delete. We'll create a new Key Pair when the time comes for us to build an EC2 Instance.