Creating an Instance#
We've now learned what we need to in order for us to create an EC2 Instance - we know about instance types, AMIs, key pairs, storage options, and startup scripts. Let's combine these details and finally build something.
Warning
This is a critical juncture for you: you're about to create a resource that costs real money. Even in the free tier, there may be costs associated with creating the following resource(s). Please consider if this is a responsibility you are able to afford before proceeding.
Login as the cloud-admin user, which now has NetworkAdministrator and EC2FullAccess permissions. That means we're setup and ready to go.
Head over to the EC2 console and select and on the left, select "Instances". Now select "Launch instance" in the top right.
Note
There are loads of ways you can reach this screen. Which ever works for you is fine. For now, we'll ignore "Launch instance from template".
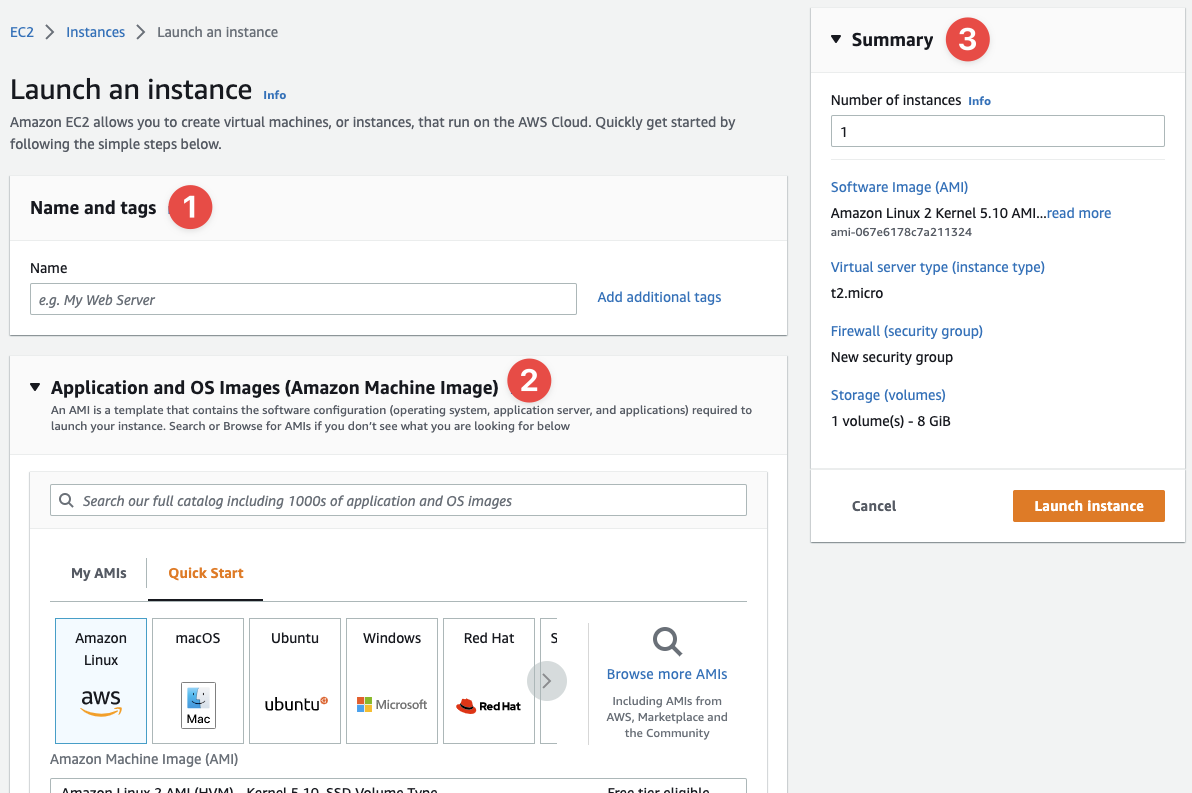
- We'll give our Instance a simple name:
my-testing-instance - We'll select an AMI, something we'll talk about shortly
- And here it where we can keep track of our progress as we go
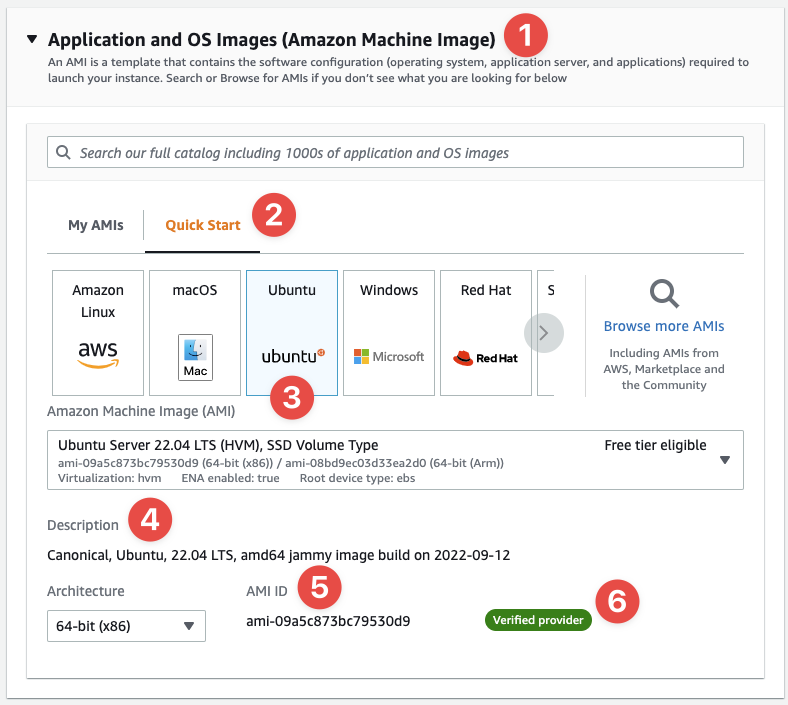
Under the "Application and OS Images" section, we're going to select Ubuntu:
Note
The AMI ID might be different for you if you're in a different region to me, or the AMI has been updated since I wrote this. It's not an issue - just make sure the vendor is a "Verified provider".
- This is where we define the AMI we want to use
- We're going to use a "Quick Start" AMI
- We're going to select "Ubuntu"
- The description should read something along these lines
- Note that this AMI ID might not be the same for you - it depends on several factors
- This is important to note - AMIs can be a major security risk
Now we need to select the instance type. Let's go with t2.micro as it's a "Free tier eligible" instance type.

- Here we define the instance type.
- And for the (SSH) Key Pair, I've selected
our-learning-keypair
Note
When it comes to instance types, not all of them will be available to you. Also, you cannot create unlimited instances. AWS puts default limitations in place to protect them, you and other customers from abusive behaviour on the platform. You can increase these limitations through a special dashboard we don't need to explore right now.
I'm not going to SSH into the new system. Instead, I simply want to see the nginx web server welcome page and then we'll delete the instance. We don't need to see what SSH looks like as we've explored it previously.
Now for the networking setup. We've been building our networking infrastructure over several sections now. This is where we (finally) get to use it. Here's how I've configured the networking for this instance:
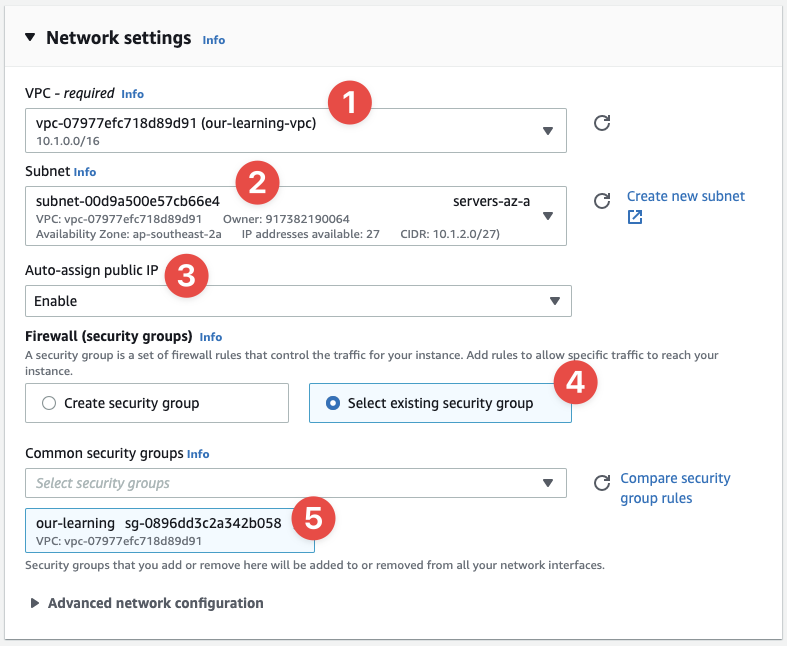
- We select
our-learning-vpc, with the10.1.0.0/16CIDR range - I'm going to place the instance inside of
ap-southeast-2a, which means I wantservers-az-afor the subnet, with a of CIDR of10.1.2.0/27 - We want a public IPv4 address so that we can connect to and test the instance is working
- We've already created a Security Group that allows HTTP(S):
our-learning-sg-https - And here we can see that Security Group was selected. You can select multiple SGs if you need to
You'll notice that I've ignored the "Advanced network configuration" options as they're not needed for our use case.
Now we just have to configure the storage by doing nothing at all - the defaults are fine. In real-world cases, which we do explore, storage becomes important, but right now we want to see everything come together into a working solution we can reach over HTTP. Storage simply is not important.
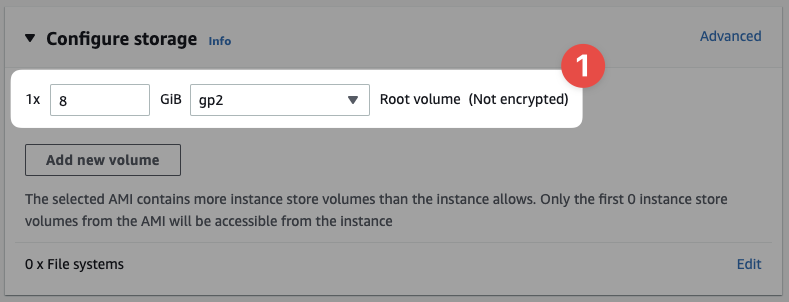
- This is sufficient storage for our needs, I can assure you
Storage options can obviously get complicated. We've covered storage types and options, but there is a whole world behind storage that's (literally) a whole job itself.
Now under advanced details we're going to fill in the "User data" form with the following startup script (Bash):
Note
This is right down the bottom! Ignore all the other fields for now. Just go straight to the bottom of the advanced details panel.
1 2 3 4 5 | |
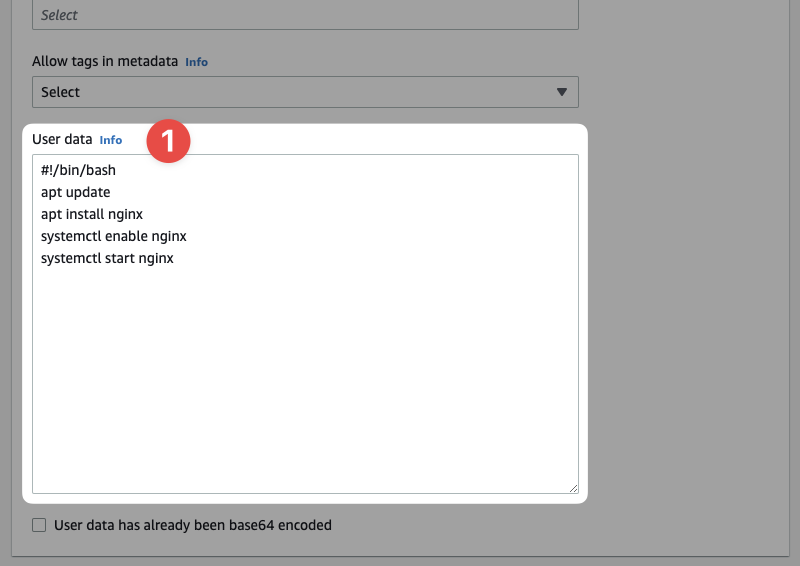
- Fill in this field with our script (above)
Now click "Launch instance" on the right-hand side, inside of the "Summary" box.
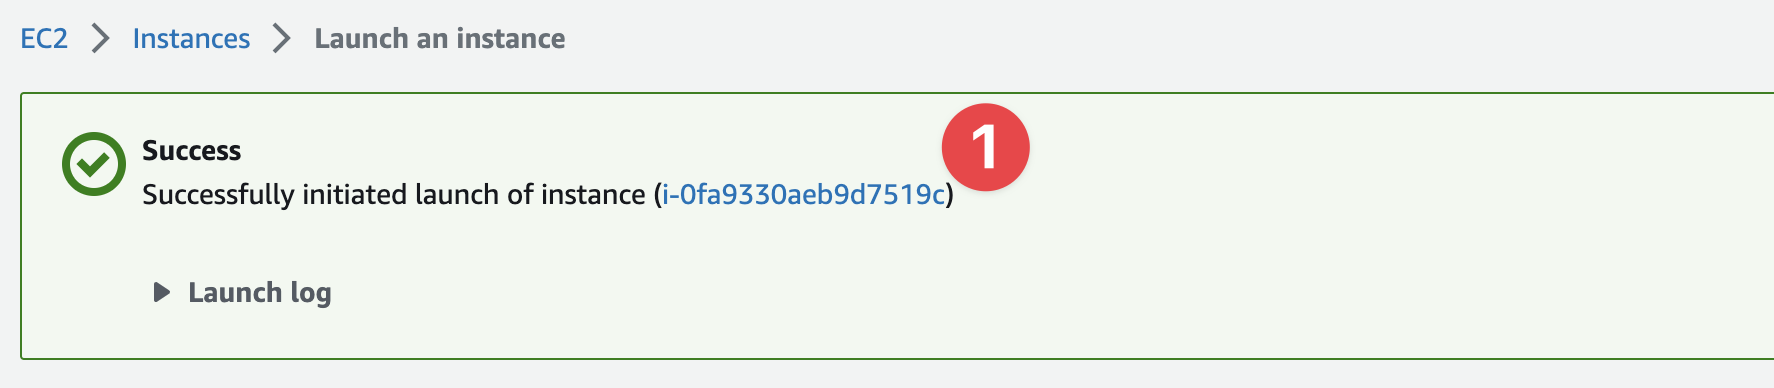
- Click this link and it'll load up the details of our new instance
Once you've clicked the link to the instance, you'll be sent to the instances page. Click the checkbox next to the instance to bring up the details in the details panel, along the bottom of the console.
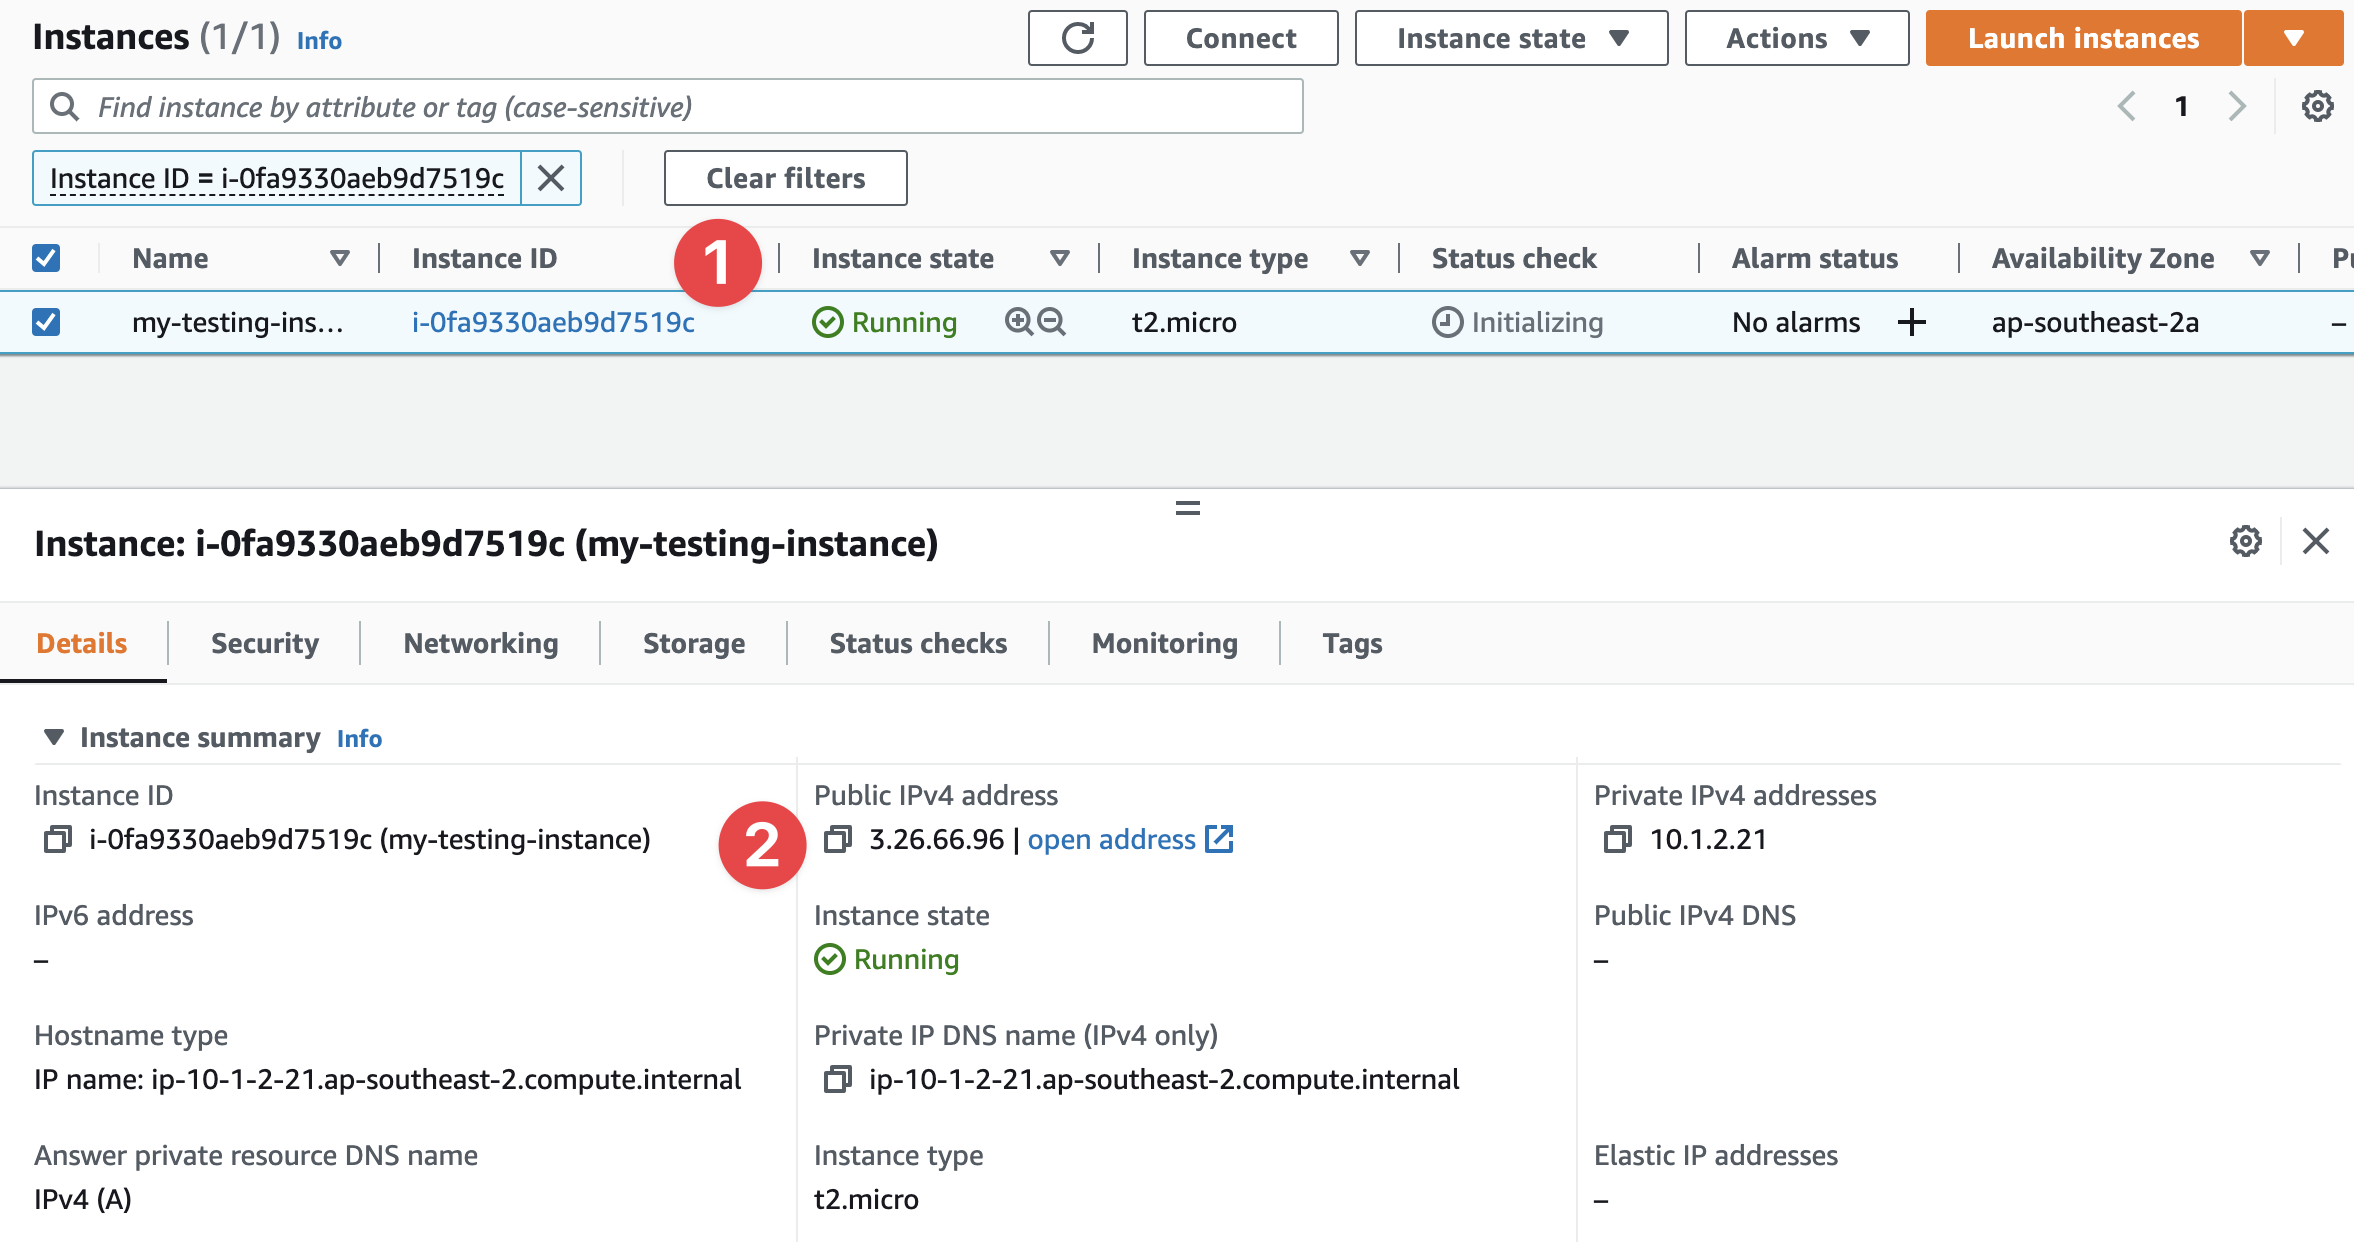
- Here we can clearly see our new instance's ID
- And here we can see the public IP address we've assigned to the instance
After a short period of time has passed, we can now access the public IP via a web browser and see what results we get back:
Note
I'm using HTTP, not HTTPS. Make sure you're using http://<ip> in the address bar.
Using HTTP is fine when we're testing things out, but for anything else HTTPS is a must and is quite easy to work with these days.
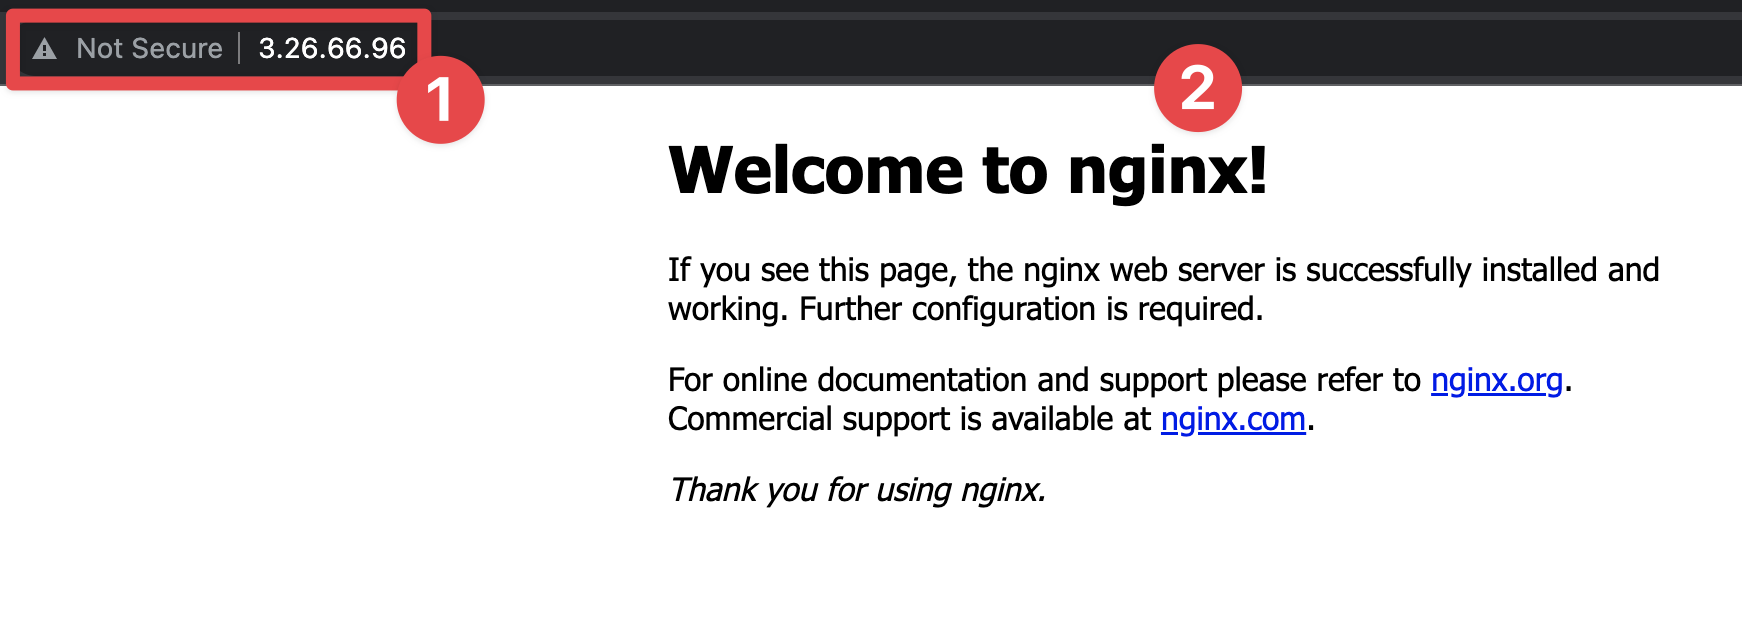
- We can see how connection is using our public, but it's also "insecure" - HTTP is an insecure protocol
- And because we installed nginx, it's nginx that's serving our HTTP connection request
And just like that we've created an instance that's utilising all of our networking infrastructure and has installed and loaded up nginx for us.
Now we're going to use this EC2 Instance to create an AMI we can launch over and over. It's a very simple example, but it's a worth while one.