Create an AMI#
An Amazon Machine Image, or AMI, is a pre-made image that you can use to create EC2 Instances. Those images can contain anything and everything you need to operate your software solution. In our case, we have installed and enabled the nginx service, but your AMI could easily have new users setup, gigabytes of data stored on the file system, 10 different services running, and more. The idea is simple: build a ready-to-deploy image you can use to get your solution going quickly.
With our EC2 Instance in place, as simple as it is, we can create an AMI. It'll allow us to quickly start EC2 Instances that already have nginx installed on them. Nothing too exciting, but great for our learning needs.
Goto the "Instances" section of the EC2 console and make sure the my-testing-instance is highlighted and the checkbox ticked. We want to create an AMI from this instance:
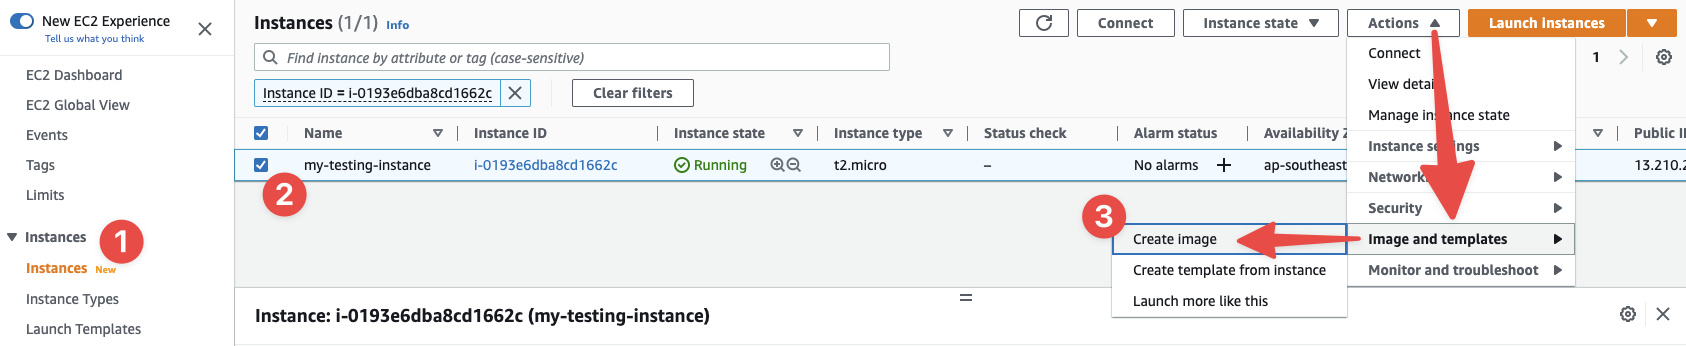
- Make sure you're here in the console
- Select our EC2 Instance - the one we just created
- And make your way to this menu option
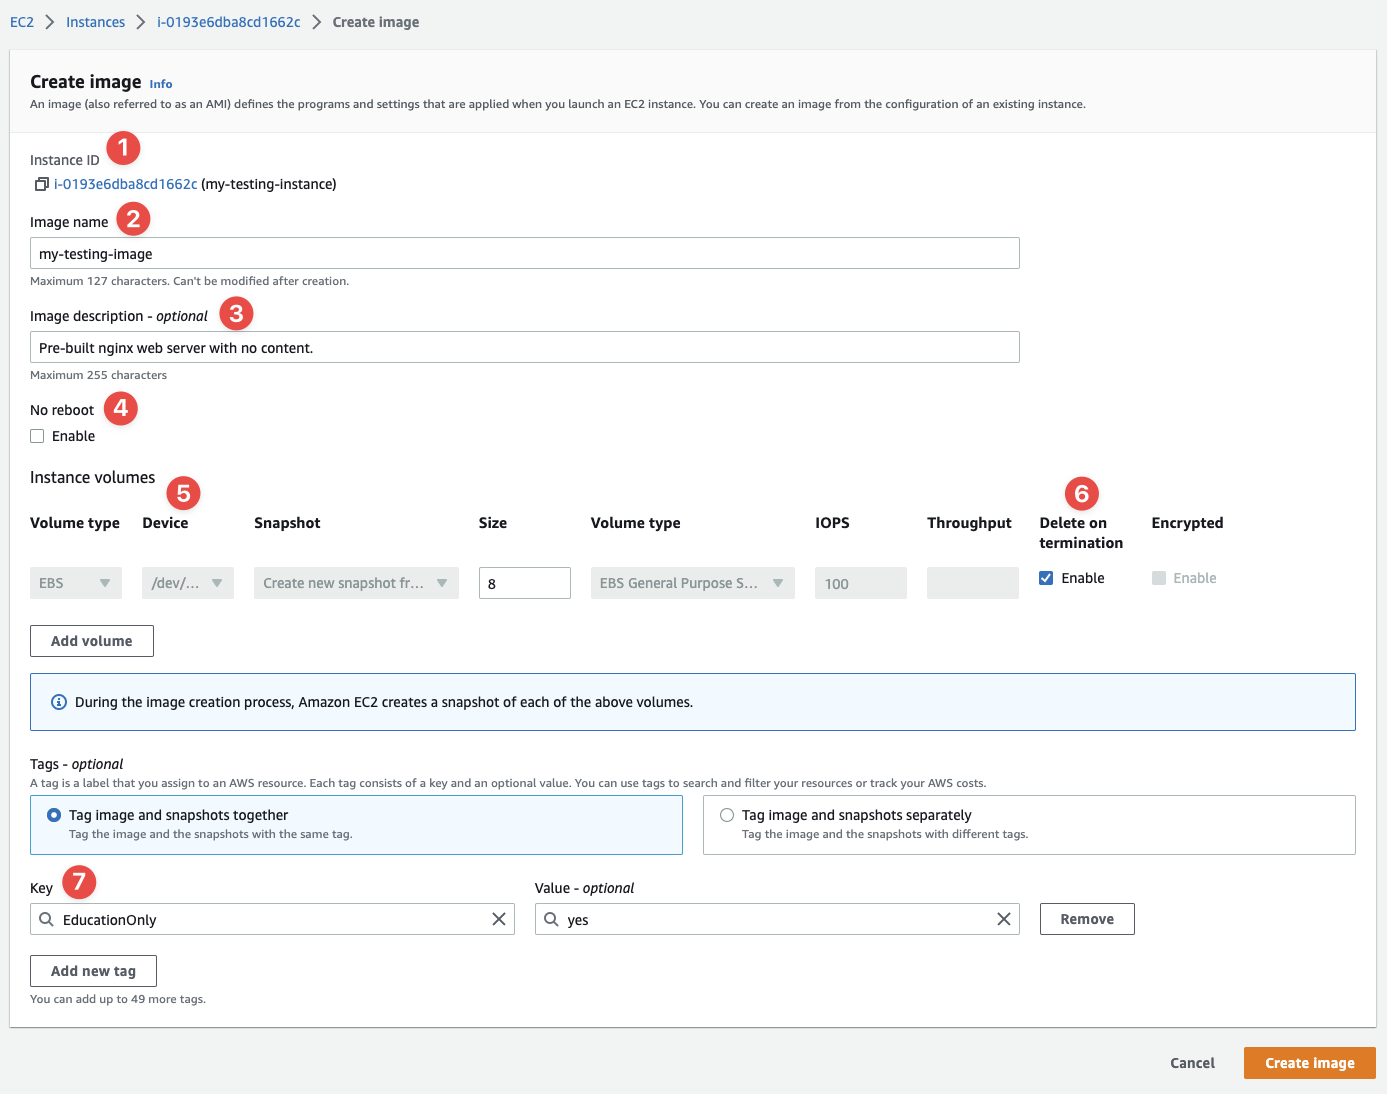
- We can confirm the instance we're creating the image from here
- We should give our AMI a name we can find and sue later on
- A good description helps others know what the instance is for
- I'll talk about this below
- Every instance has volumes attached to it, and this allows you to include them in the image
- And even define if they're deleted after you terminate an instance created from this image
- Finally, we can define tags for our image
If we look at highlight 4, above, it says, "No reboot". This can be a very important option to consider. What it means is this: "Do you want me to shutdown the instance before I take the snapshot, and then start it again, or just take the snapshot whilst it's running?" Why is this important? In a word: databases. Not just databases, in fact anything that's constantly writing to memoyr and/or disk. What you want to avoid is taking a snapshot in the middle of same data being saved either to memory and/or disk. If that happens, it's possible to create a snapshot that has corrupted data. To solve this problem, you can leave this option unchecked, and AWS will reboot the instance, taking the snapshot when it's offline, which means nothing can possibly write to memory or disk at that point in time, giving you a "clean" snapshot.
Of course, it's not always possible to reboot an instance. Other options have to be explored in that case.

Note
I have no idea why AWS thought these colours would be a good idea.
- There's an AMI ID there, hidden in that text, I promise. Try clicking it if you can see it!
If you click the (hard to see) link, you'll be taken to the AMI. Click the checkbox next to the AMI in the list and you'll get the details:
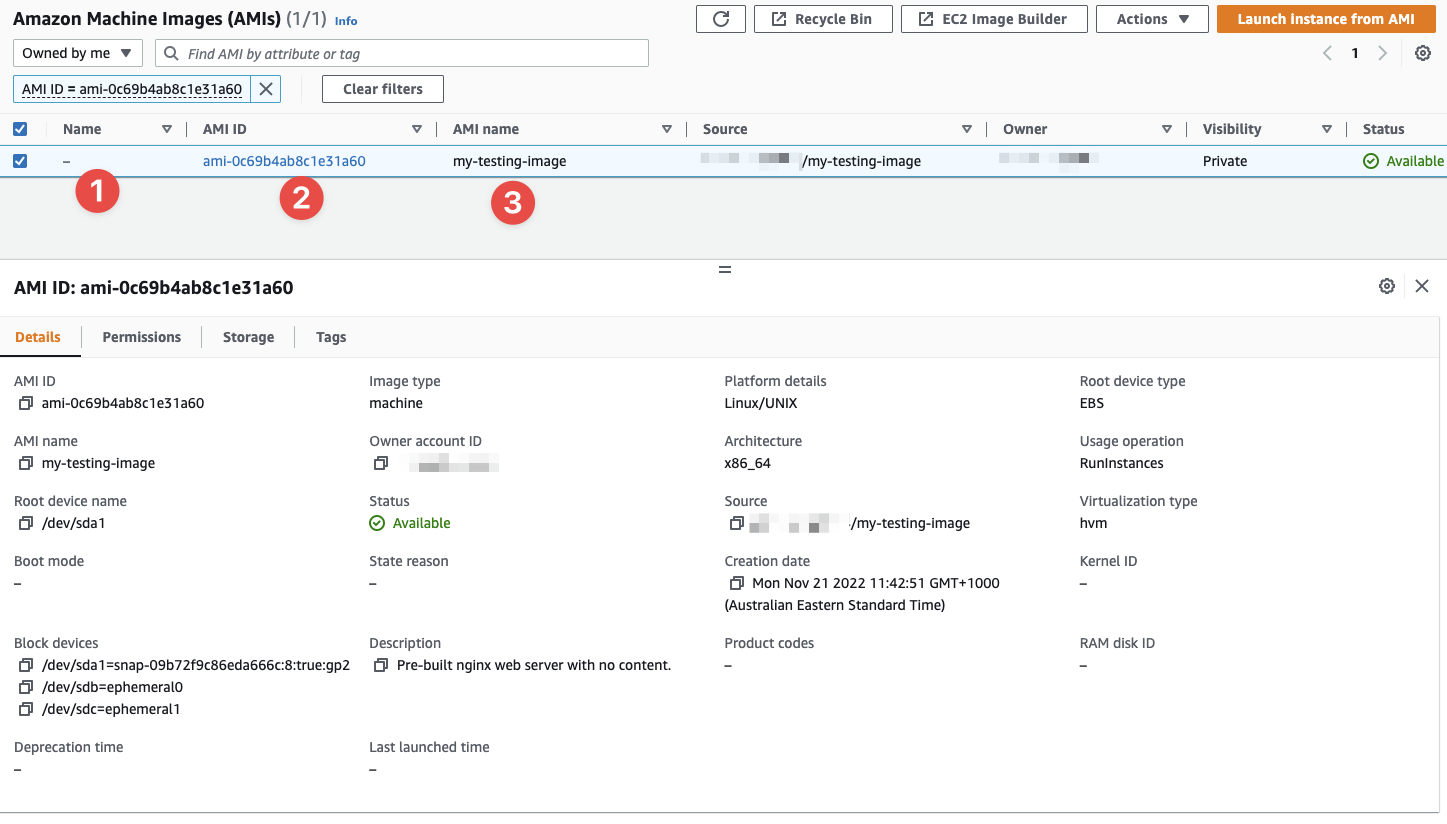
- The "Name" is blank because we did not use a "Name" tag
- The ID this AMI has been assigned
- The name we have the AMI - not to be confused with the "Name" tag
The use of the "Name" tag is for human consumption. I skipped it here to show you (remind you) of the result.
Now we have a machine image we can use to create new EC2 Instances, and we can prove it! Start by going back to the EC2 Instances console and deleting the instance we've just created:
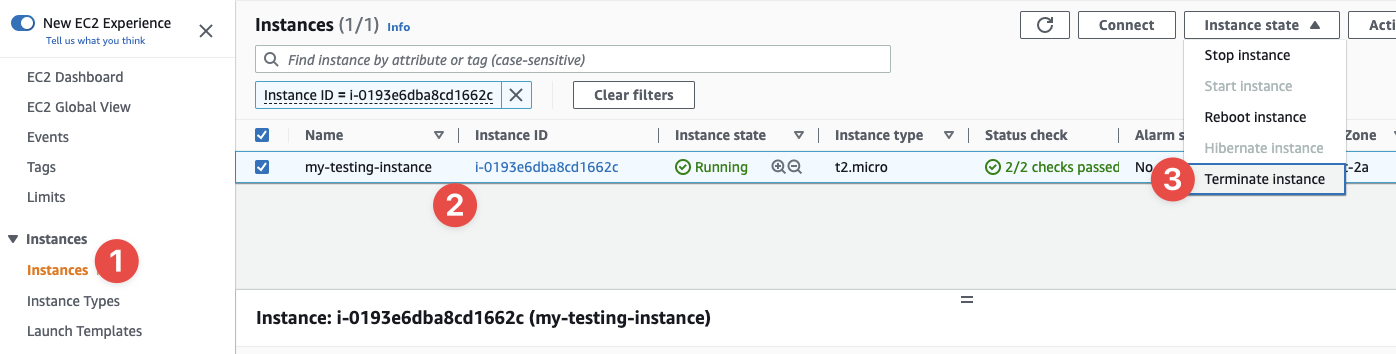
- Head over to this part of the console
- Make sure the right EC2 Instance is selected
- And select this option in the "Instance state" menu
And then complete the process:
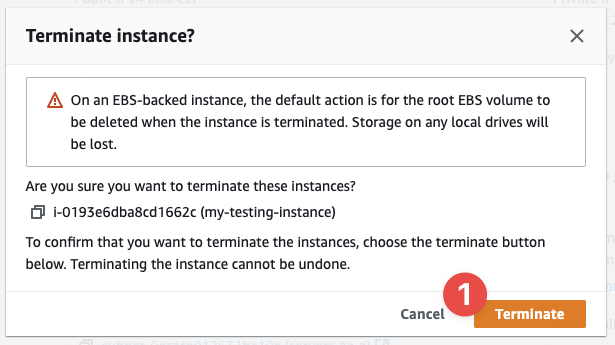
- Click here.
Once deleted, head over to the "AMIs" section of the EC2 console. We'll see out AMI(s). Select the one we've just created and click, "Launch instance from AMI":

- Make sure to check the right box, for the right AMI
- Then click this button
Now we get the exact same screen that we've seen before. The only difference this time is the AMI section has already been changed to the "AMI from catalog" tab, and our AMI has been selected for us. Everything we fill in as normal. Go ahead and do this now.
Once complete, you'll have a new EC2 Instance with a new public IPv4 address and, when visited via HTTP in a browser, you'll see the nginx welcome screen.
Congratulations! You've done a lot here. In fact, look at what you've done:
- Created an AWS account;
- Secured that account using better password policies and MFA;
- Created a few new IAM users;
- Created an entire network and subnets;
- Created firewalls and secured the networks;
- Created an EC2 Instance and AMI;
That's a lot given you've only just started out. Good job!
Now it's time to clean it all up.