Amazon Machine Image#
So, at this point we know what an Instance is and we know what the Instance "type" means and how we can select the right one, but before you can create an instance there's more you need to know. The Amazon Machine Image (AMI) is one of those things. Let's explore them now.
There's obviously the need for an Operating System (OS) when creating an EC2 Instance, and that's what an AMI gets you, plus potentially more. An AMI loads a base OS onto the Instance that you can then access via SSH, RDP, or some other protocol for remote management. The OS that's installed is entirely your choice and there are a lot of options.
AMIs also come with something else too: information about storage that is attached to the Instance that is created using the AMI itself. These typically involve EBS Volume Snapshots that are used to setup the root device attached to the EC2 Instance, but it could be configured with a template that configures an instance-store. We'll stalk about EC2 storage options in a later section. Either or, the AMI also comes with a block device mapping that states what volumes are attached to the Instance at the time it's created and launched.
Lookup some AMIs#
Let's now look at some existing, popular AMIs.
In this course, we're only going to be suggesting AMIs that are fully managed by AWS or the official vendor. Let's explore some of those options now, specifically Ubuntu 20.04 and Windows Server 2019.
Note
AWS offers Amazon Linux 2, their CentOS/RPM based distribution that they fully support and optimise to use inside of AWS. It's a nice distribution with a lot of very helpful tools built-in, but it's AWS centric and does have a high potential to lock your architecture into AWS. That's not always desirable, so we avoid it in our courses and instead focus on Cloud agnostic OS like Ubuntu and Windows Server.
Login to the AWS console and head over to the EC2 console, then click on "AWS Catalog":
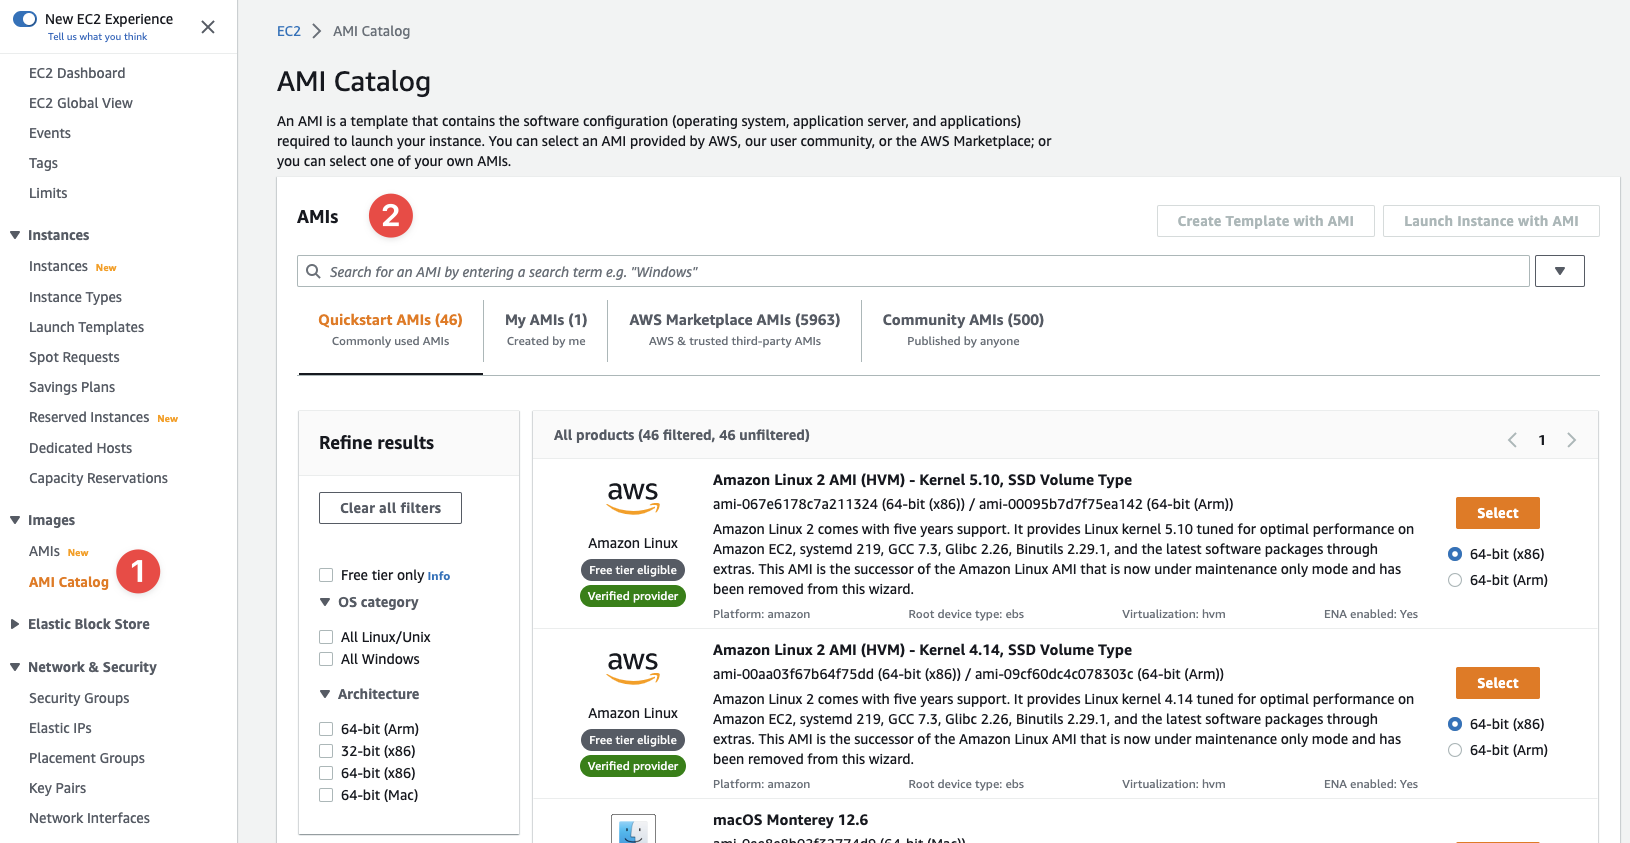
- Click this link
- And you'll see the AMI Catalog made available by AWS
This catalog is massive. The "Quickstart AMIs" section has 46 AMIs on its own, then there are 5,963 AMIs (at the time of writing) that are provided by AWS and trusted third-parties.
Using this catalog, let's look at each of the AMIs we're interested in.
Ubuntu Server#
Select the "AWS Marketplace AMIs" tab. There are literally thousands of results, so on the left hand side, under the "Operating system" heading, expand (don't select it) the "All Linux/Unix" filter, then in the list select "Ubuntu".

- Use the "Ubuntu" filter to heavily reduce the list down
- Now we can see two of the primarily options made available for the Ubuntu OS
If you select "Ubuntu 20.04 LTS - Focal", you'll get a details window pop up:
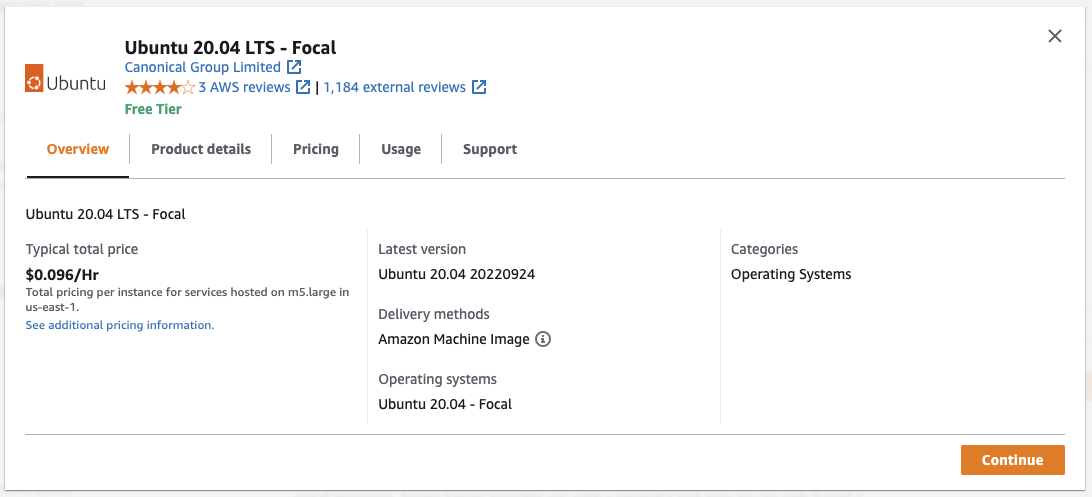
The details page offers you additional information about the image. The "Typical total price" is based on using the AMI on an EC2 Instance in us-east-1 of type m5.large. The price for you might vary, quite wildly, depending on the location and type you select.
What's not made clear (at all) is whether or not the AMI costs you an extra fee on top of the EC2 Instance's hourly fee. If you look at the "Pricing" tab, this is made a little more clearer:
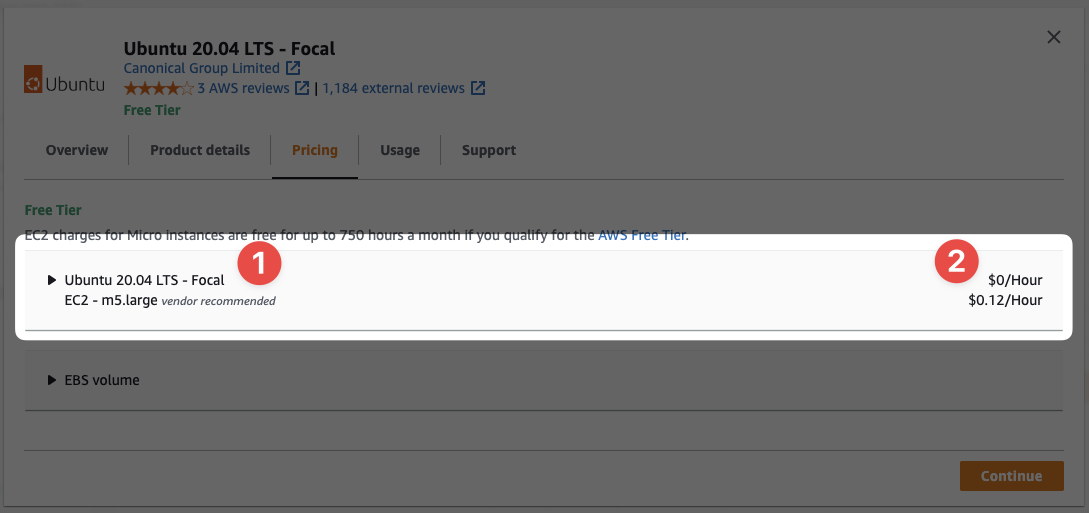
- We can see two lines here: the AMI name and the EC2 Instance type
- And the price for each one - the AMI costs
$0/Hourto use
The AMI clearly has no additional cost for using it, but some do, so be careful.
So what information do you need to use this AMI? The ID is sufficient, but the UI in this part of the console doesn't make it easy to get the ID. I believe AWS' thinking here is this: the ID changes frequently with updates, and it's different for every region.
Finding the latest AMI ID for your region involves a few extra steps. On the AMI Catalog page, keep the results filtered down so that you see the official "Ubuntu 20.04 LTS - Focal" AMI - the same one we looked at earlier. Click "Select" to hight light the AMI, and then we get the AMI ID:
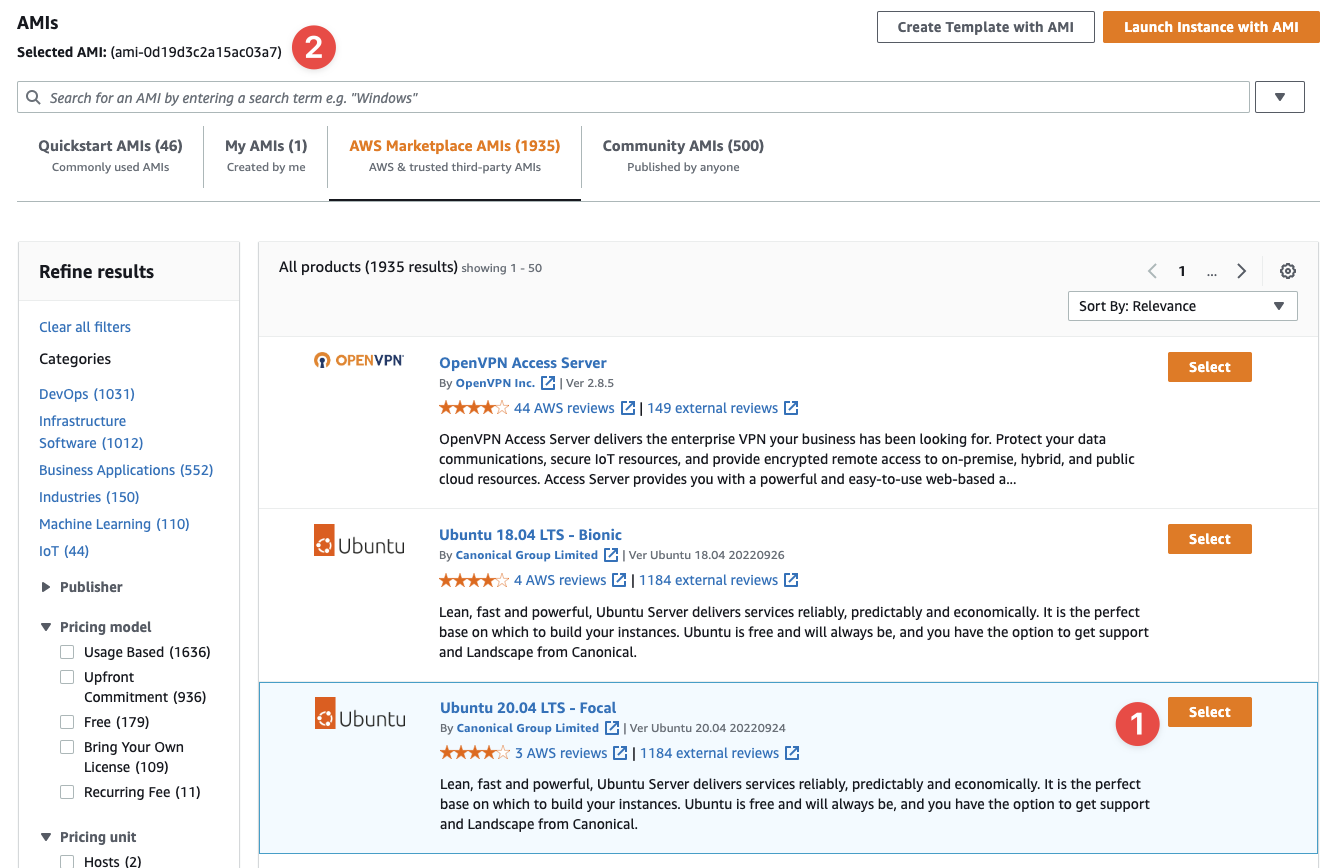
- This is where we select the AMI
- And here we can see the AMI ID that we just selected
BUT! That ID is for ap-southeast-2, or Sydney (Australia), which is my default region. This ID is only usable in that region, so unless you want to use Sydney as your region, this ID is of no use to you.
To get the ID for your region, change your region in the console (top right.)
We're not going to use these AMI IDs yet. We have a few things to learn yet.
Windows Server 2019#
Let's clear our filters and look for Windows Server 2019:
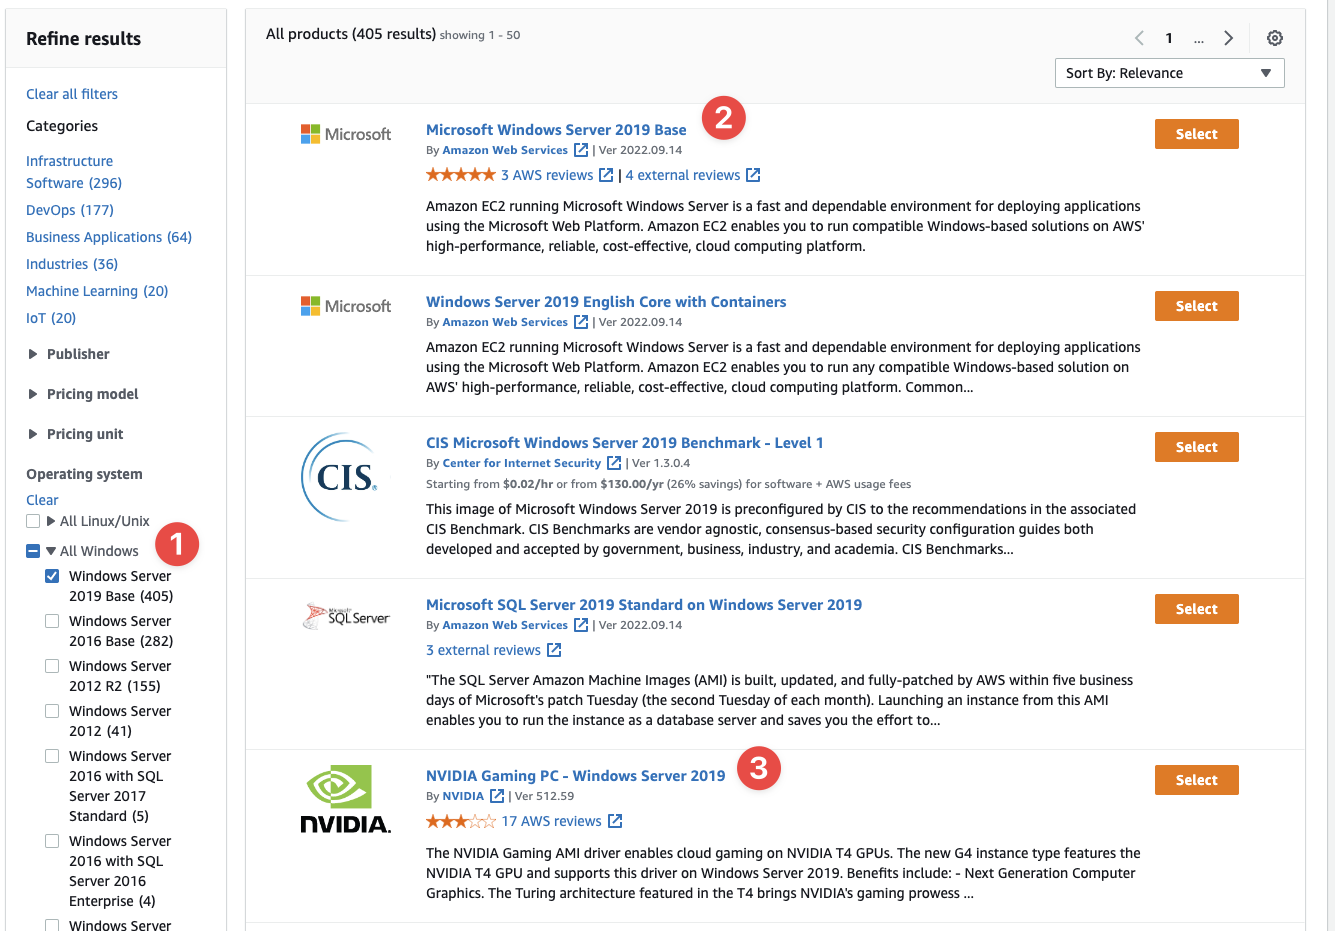
- I've filted the list down to just "Windows Server 2019 Base"
- And we can see at the very top we have exactly what is to be expected
- But we also have something interesting here: an example of using GPUs in the cloud - fun!
And if we click on the first option and review the details page, we get something somewhat interesting:
- Windows Server doesn't actually cost anything extra neither!
This comes at a bit of a surprise to some, because Windows Server tends to require a licence, this particular "base" AMI does not. That's pretty handy if you have Windows Server based workload you want to move into AWS.
If you "Select" this AMI in the list, you'll see it has a different AMI ID too.
Third-party tools#
There are some tools you can use to help you find AMI IDs, but if you're going to use them, make sure you're checking the IDs they're giving you. Double check the owner/author of the AMI and ensure it's a vendor you trust.
- Ubuntu (Server) is developed and maintained by Canonical
- Windows Server is developed and maintained by Microsoft
- Amazon Linux Server 2 is developed and maintained by AWS
And so on. Be careful when using random AMI with unknown developers - they can contain any software the developer wishes, and that software can do anything they wish, too.
Note
Just use the AWS Console and the "AMI Catalog" feature. It's not the best interface in the world, but it's probably the easiest.
Vendor Marketplace#
When an AMI is created by a vendor (or you), it can contain any software you like on top of the base OS. A lot of vendors us this to sell their appliance and software directly in AWS on a per-hour cost.
For example, Cisco sell the following AMIs:
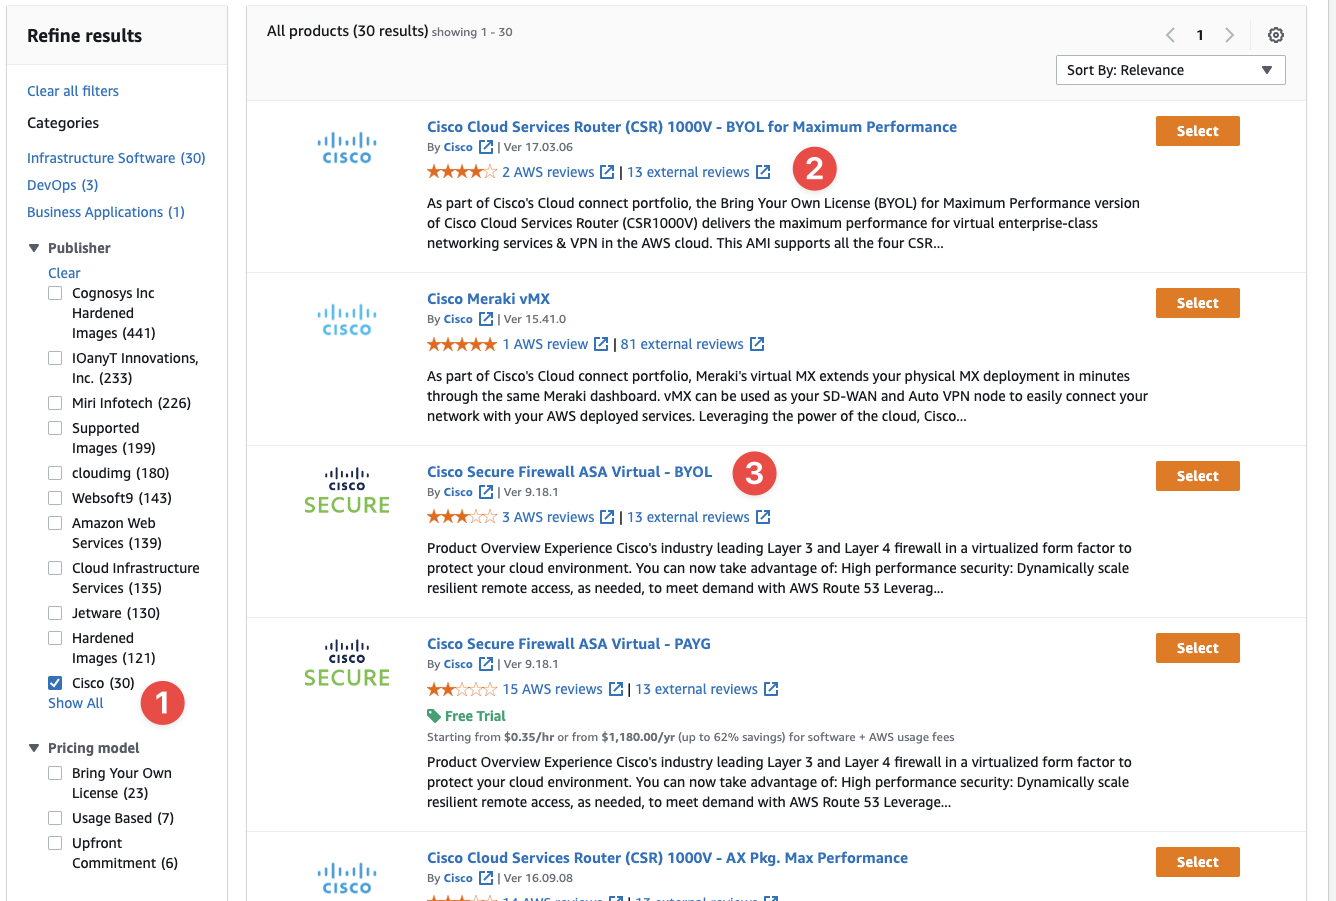
- I filtered the list using the "Publisher" filter and searching for
Cisco - We can see a virtual router here is available
- And we can see the very popular Cisco ASA firewall (a physical firewall) is available as a virtual appliance
Those example appliances are Bring Your Own License (BYOL), so they don't charge an additional hourly fee. You pay for a license to use the software included with the AMI. However, below the BYOL option (3 in the list above) is a Pay As You Go (PAYG) offering, which charges an extra US$0.92/Hour on top of the base EC2 Instance cost:
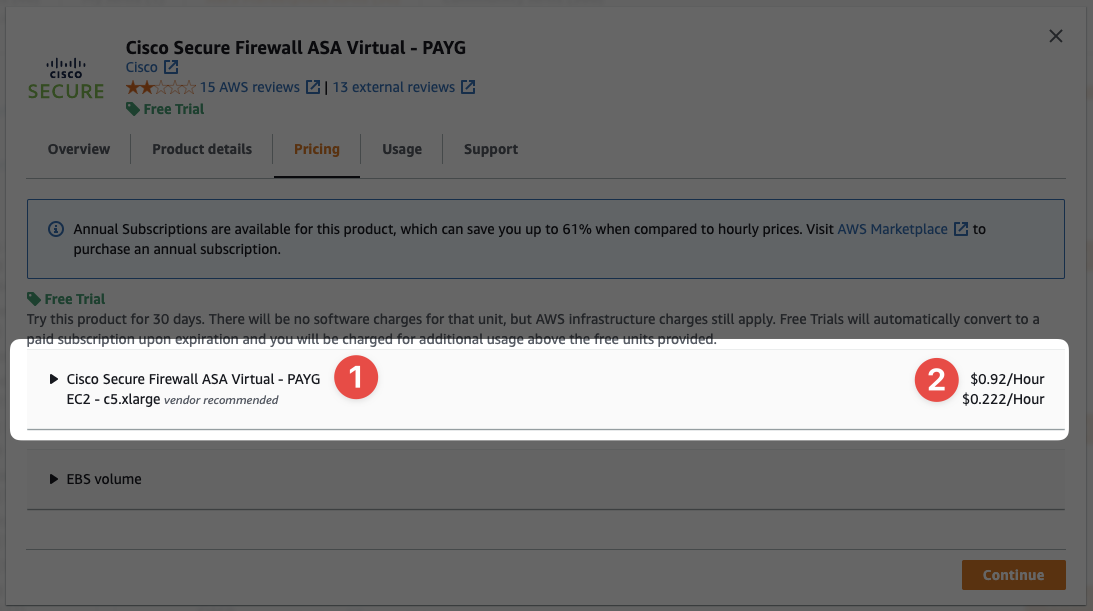
- We can see the PAYG option here
- And the additional hourly fee for use of Cisco's software
Which is cheaper? BYOL or PAYG? Probably BYOL if you can negotiate the price down, but PAYG might be cheaper for new customers.
So you can see that AMIs offer more than a simple OS and some software - they can actually be used as a revenue stream for vendors and even you should you choose to take that route down the line.
Next#
At this point you've got enough knowledge to move on. We'll explore AMIs again this section when we create our own, but before that we need to create an EC2 Instance, and before that, we have a few other things to learn first.